Getting Started with Google Ads
Google Ads is a staple platform used in online marketing all over the world. Most marketers turn to it first and rely on it to give them the boost they need. Nowadays, Google can be considered as the dominating brand on the internet, so it makes sense to start there.
Google Ads can seem a bit daunting at first, and that’s completely normal. Thankfully, it’s easy to pick up once you’re in and is actually quite intuitive to work with. You can realistically go from setting up simple, self-managing campaigns (where you basically set it up once and never look at it again), right through to advanced, audience-specific, re-marketing efforts in almost no time at all.
With this in mind, this resource will go through the basics of Google Ads here. It’ll cover steps to follow and actions to avoid, discuss some of the theory behind certain elements, and how to work towards a fully functioning campaign. But first, let’s look at what Google Ads actually is and how the system works.
What is Google Ads?
Google Ads is an online advertising platform owned by Google. It’s easily the biggest and most-used advertising network in the world, with millions of businesses using it to grow and reach customers.
Google Ads can be split into three main markets:
- Search advertising (Google Search Network) is where you can target keywords that people search for. You then pay for clicks on ads targeted towards those keywords. This is sometimes known as paid search.
- Display advertising (Google Display Network) lets you show visual banner-style ads around the web on blogs, shops, forums and other websites. According to Google, the Google Display Network reaches over 90% of users on the internet.
- YouTube advertising lets you show video ads before, during or after YouTube videos. You can also use them to promote your own videos across YouTube.
There are other markets that Google Ads works in, like Discovery, Apps, Local, and Shopping, but often these are in addition to the above.
Quick side note: Google Ads is used to access all of the above markets, but most of the time, when people say “Google Ads” they mean Search. The others are usually referred to by name.
This guide will focus on Google Search Ads.
How does Google Ads work?
Almost all Pay Per Click advertising platforms work the same way. Put simply, a bunch of advertisers bid to have their advertisement appear in the search results of any search made by a customer. The highest bid then appears at the top, the second highest is second and so on.
Google Ads is based on this system, but there is another element: quality. Ultimately, Google needs searchers to trust the ads shown to them, to ensure that they remain positioned as the “go-to” search engine. Google assigns each ad a Live Quality Score, and measures the impact of any ad extensions the advertiser is using. By looking at these, an advertiser can pay less and still top the auction. Let’s look at how we can get started:
Important Terminology
- Pay-per-click (PPC): The general term for paid online advertising, in which you’re paying by the number of clicks on your ad.
- AdRank: A value assigned to your ad position in relation to other ads. Essentially, when several ads are showing up at the top of a search engine results page, this is where your ad shows up in the queue.
- Bidding: The highest amount you’re willing to pay for an ad click.
- Click-through rate (CTR): The number of clicks your ad receives divided by the number of times your ad is shown, as a percentage.
- Cost-per-click (CPC): What each ad click costs.
- Conversion rate: The average number of conversions on your ad, as a percentage. A conversion is an action you want visitors to take after they’ve clicked the ad – a sale, call, signup, etc.
- Keywords: Words or phrases describing your product or service that you choose to help determine when and where your ad can appear.
- Quality Score: Google’s assessment of the quality of your ads, keywords, and landing pages.
- Search volume: The number of searches expected for a keyword within a certain time period.
Step 1: Getting Your Account Set Up
First things first: you’ll need to set up a Google Ads account.
If you are going to use Google Ad Grants, the set-up process is different. You need to follow the instructions on the Google Ad Grants Activation Guide. Once you’ve completed your set-up, rejoin this guide at Step 2.
There can be a slightly different strategy to using Google Ad Grants. For a more tailored approach to utilising the free credit, read our guide on Successful Ad Grants Campaigns.
Also, Google does have a habit of tweaking these options, so these instructions might not match your experience exactly.
This process is to set up the account and create your first campaign. However, the first campaign you create is just going to be a dummy. You don’t actually want to create a functioning campaign at this point, but focus on filling in the basic fields.
Let’s get into it.
- Go to Google Ads and hit the “Start Now” button in the top menu.
- You will then need to login to the Google Account you want to use for ads. If you don’t have one, go ahead and get one set up. We would recommend using a central email like [email protected] for this.
- If it then prompts you to create a new Google Ads account, click to do so. You should then see a prompt to choose your marketing goal. The choice you’ll make here will pre-fill some of the options in the wizard. Select whichever is closest to what you want to achieve and hit next.

- Now you’ll need to enter your business details and website. After a quick scan, it should show you a preview of your site.
- On the next step, you’ll be asked to create an ad. The wizard should have pre-filled most (if not all) of the fields. Remember, at this stage we’re just going through the motions, so go ahead and click next. (If any errors are flagged up, correct them before hitting next again).
- The next few steps are the same: hit next on the Location, Budget settings, and Review. Work your way through the rest of the page, entering the relevant information. If you need help with any field, hover over the little question mark for more information. Make sure to enter a payment method too (we’ll make sure you don’t get charged anything in the next step). When you’re ready, hit Submit.
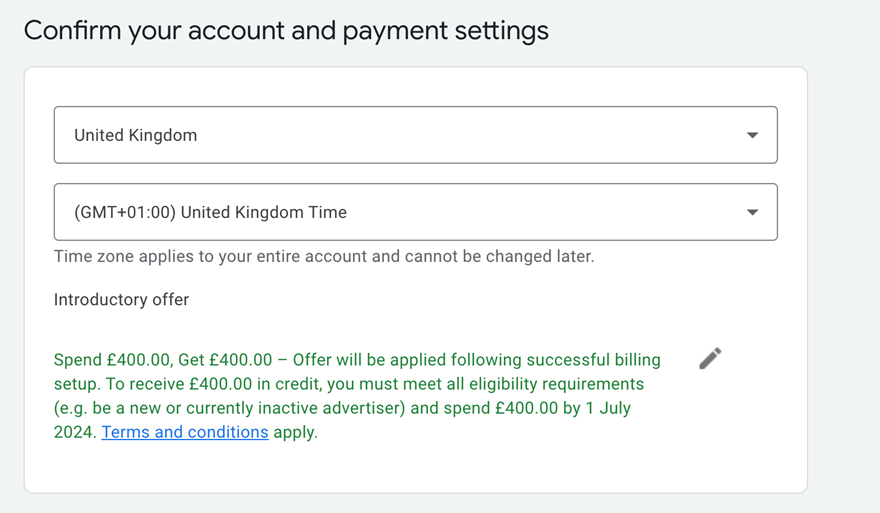
You will also be given an introductory offer of £400 in matched credit. This is great to get you some extra budget in the first couple of weeks running your ads campaign. (Correct at time of writing this guide)
- Once loaded, there will be a button to “View your campaign”: click this to enter Google Ads in full.
- Now we’ll pause the campaign so you don’t get charged. Near the top, there will be a greyed-out button which says “pending”. Click on that and hit Pause. If a warning appears, click Pause on that too.
- For the last step in this section, click on the settings icon in the top menu. Click “Switch to expert mode”, and don’t worry, it sounds more complex than it is.
That’s it: you’ve completed your setup.
Step 2: Keyword Research
Now you’re set up, it’s time to really get started.
The first thing to do is keyword research. This is one of the most important steps in the setup process. It’s going to drive the direction your ads are going to take, and the way you create your ad copy.
But before that, some important definitions:
- Keyword: the words and phrases a searcher enters into a search engine. They are also known as search queries.
- Keyword Research: the process of identifying, collating and parsing possible keywords you can target. You can also use it to understand your market, gauge demand and find competitors.
The Research Process:
- Identify and collate potential keywords to target. These should match your marketing goals, and be achievable.
- Group the keywords you’ve chosen by theme.
- Keep breaking those groups down until the groups are as small as they can go.
Choosing your keywords
Selecting the right keywords is vital to making sure you spend your cash in the right place.
First, you can start a discussion with your teams. Find out what your main services or products are – what do you do for the people who are looking for you? Think about what makes your organisation unique. If you can, speak to some of your customers to see what they find valuable from you.
Once you’ve done that, you’ll have some basic ideas of how people might search to find you online. But now, you’ll need to gather some hard numbers and statistics. For this, we’ll delve into the Google ecosystem.
Inside Google Ads, there’s a tool called Google Ads Keyword Planner. You can find it when you’re logged into Google Ads by going to Tools in the top bar and finding Google Keyword Planner in the menu. The tool itself is pretty straightforward: simply enter a group of potential keywords or phrases and the tool will return the monthly search volumes, and estimated cost per click. It’ll also suggest other keywords which are linked to the ones you entered.
Top tip: Often, ad accounts are seen that do not have enough keywords. Make sure that you have at least 50 keywords across your ad groups to start with to allow for volume. You can then filter down and optimise later in your Google Ads journey.
So now you can see a bunch of keywords in the tool. How do you pick which ones you are actually going to use?

These five points need to be assessed on each possible keyword. Let’s look at each in a little more detail:
Relevance: Does this keyword actually reflect the content on the page?
Suitability: Does this keyword align with your mission, values and offer?
Popularity: How often are people searching for this keyword?
Opportunity: How likely is it that you will achieve good visibility for this keyword?
Motivation: How likely are people who searched for this term to convert?
If you can answer each of these with a positive answer, then the keyword is right for you. However, there are times when you come across a keyword which may be lacking in one or two areas, but could still be worth selecting. For example, the keyword might be super-relevant, but not as popular as you would like. These can still be useful to add to your list of keywords.
Grouping your Keywords
Now that you’ve selected your keywords, you will need to group them. To start with, you can group them by theme. For example, anything to do with “days out” goes in one group, while anything to do with “watching a show” goes in another.
Next, you’ll need to look at each group and see if you can break it down further: the “days out” group may contain keywords to do with “family days out” and “solo days out”. These are different themes again, so they can go into separate groups.
The idea is to keep breaking the groups down by theme until you can’t anymore. Another way to think about the ad groups is to see them as customer personas. If you’d like to dive deeper into developing your audience into personas, check out this resource Segmentation Audience Personas – Digital Culture Network
Different types of customers will use different keywords therefore it can be helpful to target them this way. You can then adjust your headlines according to the keywords; specifically targeting the customer type or the specific theme of keywords.
Once you’ve done this, you’ve completed keyword research for now.
Step 3: Creating your Ad Campaign
With your keywords finalised, it’s now time to create your campaign.
A campaign represents a goal that you want to achieve. For example, your two goals might be to increase views of a video and to sell tickets. They could have two separate campaigns. Maybe your goals are to sell tickets and sell merchandise, in which case two different types of sales would be easier to manage in two campaigns. Back at the start of the keyword research exercise, you would have thought about your various products and services, and usually these match pretty well to your goals.
To set up your campaigns:
- If you aren’t already there, navigate your way back to the Overview. Here, you will see a large blue button with a plus: click that to start the new campaign wizard.
- You will then need to choose the campaign goal. These goals will help complete the wizard, but will also limit your options. If you want to set up a search campaign, you will need to select the Sales, Leads, Website Traffic or No Guidance option. Now, you can specify that you want it to be a Search campaign.
- In the next section, select how you want to reach your goal. For most, it will be website visits. Go ahead and complete anything it asks for. You may also see a warning about conversions here. Don’t worry about this right now. Hit Continue when you’re ready.
- You’ll now need to go through some general settings. The key ones are noted below:
- Campaign name: This should be clear, understandable and easy to read. Imagine you have 20 campaigns – you will want to see which is which at a glance.
Network: Here you will select if you want your ads to appear on Google partner sites (eBay, Gumtree, etc) and the Display Network. Always untick Display Network when setting up a Search campaign.
- Start and End Dates: Under the additional settings, you can set a start and end date for your campaign.
- Location: Here, you can select the location to target. You can either simply select a single location, down to postal prefix level, or use the advanced search to select multiple locations to target or exclude or even a radius around a location.
- Budget: You can set your daily budget here. The keyword planner can give you a decent indication, but consider being a little generous here if you can. You can change this later if needed.
- Bidding: Google’s algorithm will automatically manage your bids for you. Depending on the goal you chose earlier, this will be set to the option that Google believes is most suitable. If you want, you can change the focus to another metric.
- Site Extensions: Site extensions are vital for any campaign and are proven to improve the number of clicks on an ad. Include as many as you feel are relevant to help maximise the size and presence of your ad.
- When you’re ready, hit Continue.
- Now, you can set up your Ad Groups. This is where those groups of keywords come in. Name your first Ad Group. Remember: keep it clear what’s in the group.
- In the keyword field, enter the keywords in that group, each on a new line. If you have more than one ad group, you can hit the New Ad Group button at the bottom. Once you’ve created the Ad Groups you need, hit Save and Continue.
- Nearly there! Now to create the Ads themselves. Let’s look at some of the key fields:
- Display URL: This is a completely aesthetic field. It only appears on the ad and doesn’t change the target landing page at all. Use it to fit your keyword in.
- Headlines: Enter as many headlines as you can think of. These are your key selling points and the bits that will grab the attention of the user. If possible, include the keywords from that ad group in your headlines.
- Headlines can be split up into 3 categories:
- Branding: This is important especially if your brand image carries trust and can ensure customers are more likely to click.
- Product and its USPs: It is important to match your headline to the specific search term. It can help by adding what makes you special.
- Call-to-actions: What are you actually wanting your customers to do? Try and add urgency where you can.
- Description: This is a longer field where you can go into slightly more detail on your offer. Include a call to action here. If possible, include the keywords from that ad group in your descriptions.
- When you’ve created your first ad, you can hit Save. Google will only require you to create 1 ad per Ad Group and will find the best combinations of headlines and descriptions to drive the most clicks.
- Re-do step 6-8 with your other ad groups. Remember to change your headlines according to the themes of keywords within that Ad Group.
- Do a final review and hit Publish. Your campaign will now go to review and then go live soon.
You’re all done. You’ve set up your first campaign. Take a break, have a cuppa. If you got stuck anywhere please get in touch with us using the options below.
What Next?
This article has explained the process of setting up and creating your first Google Ad.
The Digital Culture Network is here to support you and your organisation. Our Tech Champions can provide free 1-2-1 support to all creative and cultural organisations or individuals who are in receipt of, or eligible for, Arts Council England funding. If you need help or would like to chat with us about any of the advice we have covered above, please get in touch. Sign up to our newsletter below and follow us on X @ace_dcn for the latest updates.