How to integrate Spektrix with Google Analytics 4
Google Analytics 4 (GA4) can tell you how your website users found you, what they did when they got to your website, and how likely they are to convert to ticket sales, donations and memberships.
Spektrix have now made it possible to integrate your website and booking pathway with GA4, and since they’re one of the ticketing and Customer Relationship Management (CRM) providers chosen by many arts organisations across the country, we’ve worked with them to help get the sector up and running with improved analytics.
The following steps will explain how to create a new Google Analytics 4 account, configure Google Tag Manager to connect with Spektrix, and make the changes live on your website.
Creating and configuring a Google Analytics 4 account
Make a Google Account (if you don’t have one)
When creating a new Google Account you can use your own email address, it does not have to be a Gmail account. You can reach this setting by choosing For my personal use on the first step. Enter your name, date of birth and you will see the option to Use my existing email at the bottom when it asks you to create a Gmail username. We suggest you create a Google Account using a shared inbox organisational email address (for example: [email protected]) and set this as the administrator of your different Google platforms. You can then add additional users at different permission levels (and remove them if they should ever leave). To save yourself from future heartache, do not use a shared Gmail account.
What type of Google Analytics account do I have?
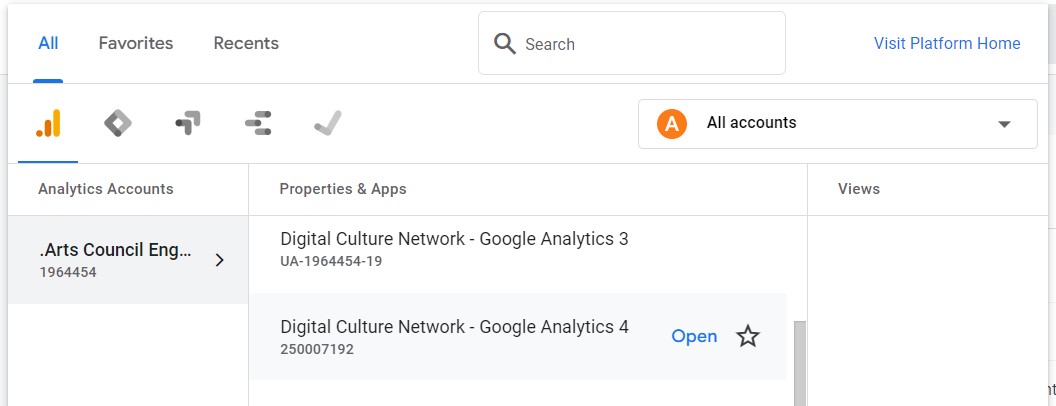
When you log in to Google Analytics you will either be prompted to create a new account, or it will load the analytics homepage. If you see the home page you can click the dropdown next to the search bar to show more information about the account.

There is an identity number (ID) under the name in the Properties & Apps column.
Creating a new Google Analytics 4 property
If there is no existing GA4 account, you can set up a new one by navigating to the Admin section using the cog icon at the bottom left of the screen.
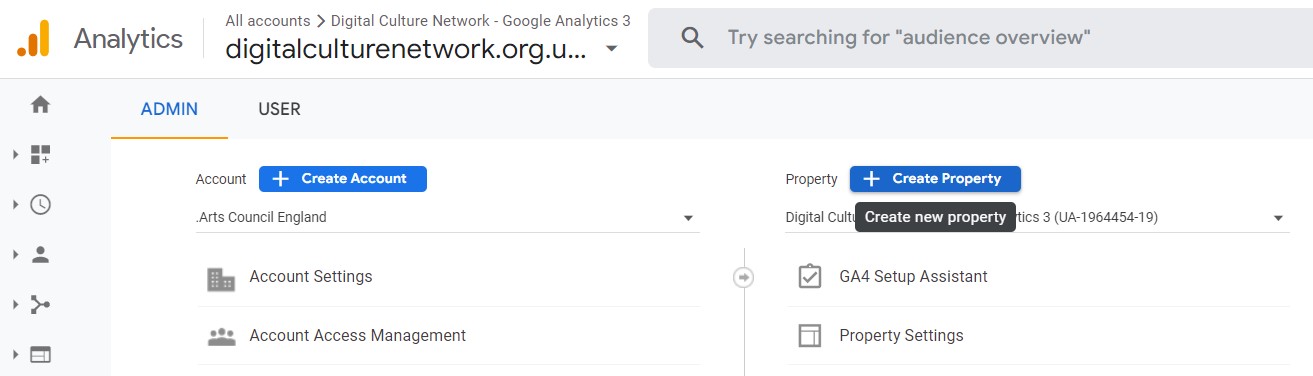
On the second column click the + Create Property button.
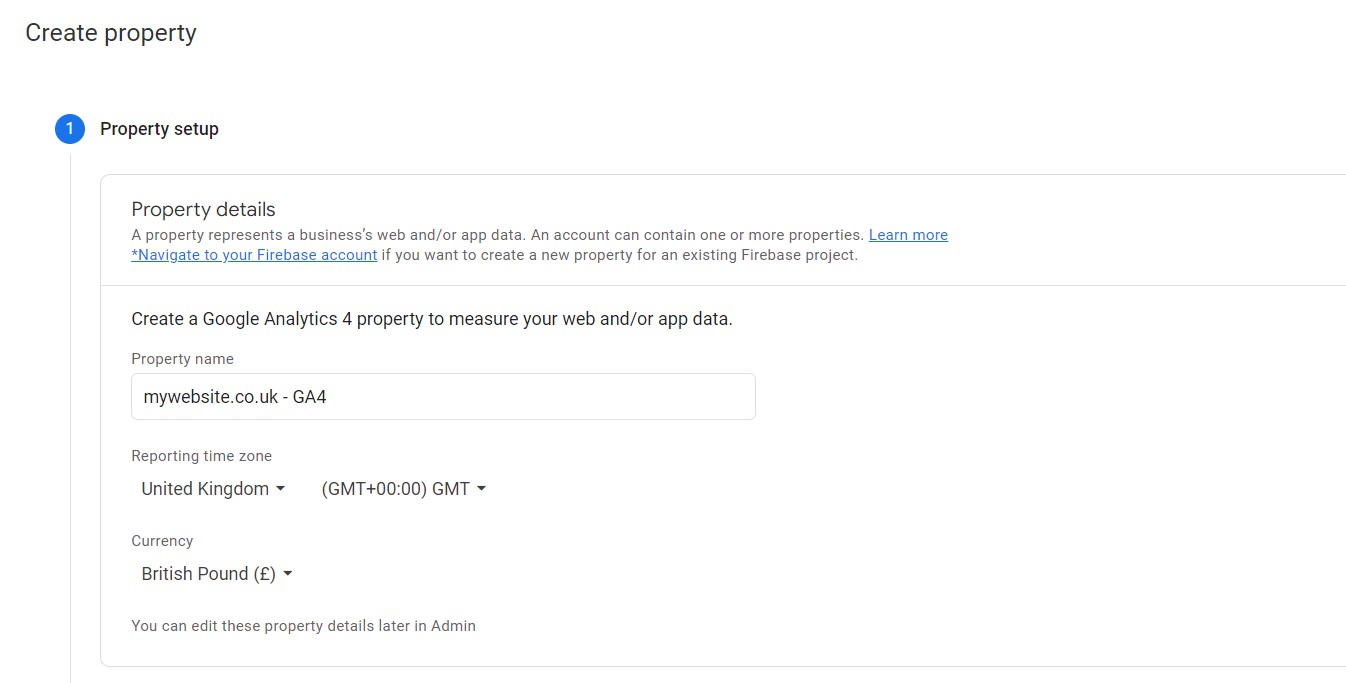
Here you can give your new property a name, we recommend your website address. Set the time zone and currency to your locality and press ‘next’. The following page will ask optional questions about your industry category (most likely Arts & Entertainment), business size, and how you intend to use GA4. Click Create to move to the next step.
Create your Data Stream
Google Analytics 4 can collect data from multiple websites and apps. In this example we are setting up a data stream for a website, so select Web from the options.
Here you will need to enter the web address of your website and give it a name. We recommend the same for both.
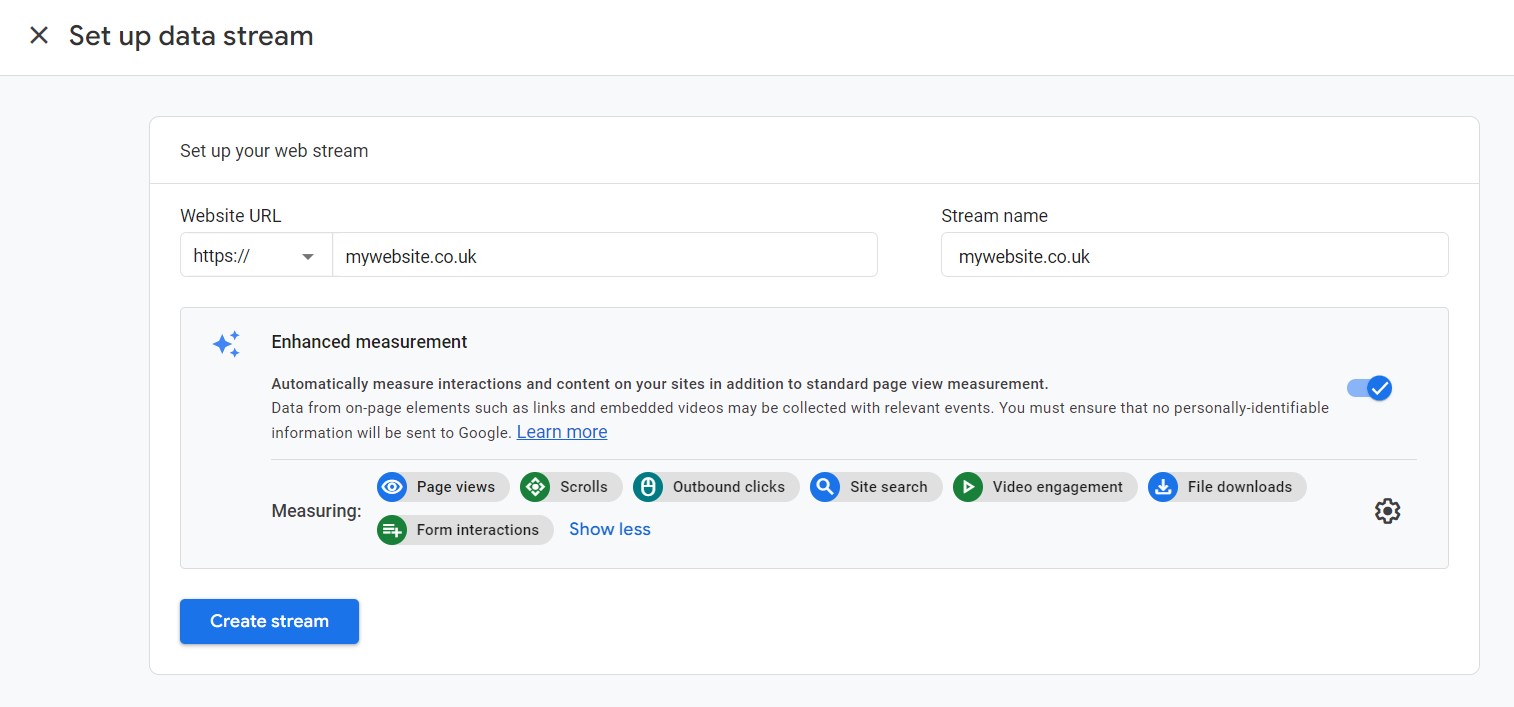
There are options for Enhanced Measurement, these are additional user actions which can be tracked on your website and explored in Google Analytics. Click the cog icon to toggle individual Enhanced Measurement settings on or off.
One of the Enhanced Measurement settings is Form interactions which is a new addition that we recommend turning off at this stage as it can add a lot of unnecessary data to your reports. You can turn it back on at any time through the Admin settings.

Note: If your website has YouTube videos that autoplay on your web pages, such as in the header, you may wish to turn off the Video engagement setting. This can also be done via the Enhanced Measurement settings. We have seen a few cases where this setting prevented the videos from playing. It may not be the case for your website, but something to check once you have set GA4 live on your site.
Once you are happy with your settings, click Create stream.
You will be presented with Installation instructions in a pop up. We will be installing GA4 manually, using Google Tag Manager, so can close this page using the X.
The Web stream details page will load with your Measurement ID. Copy and paste this into Notepad or an email as we will be using it later.
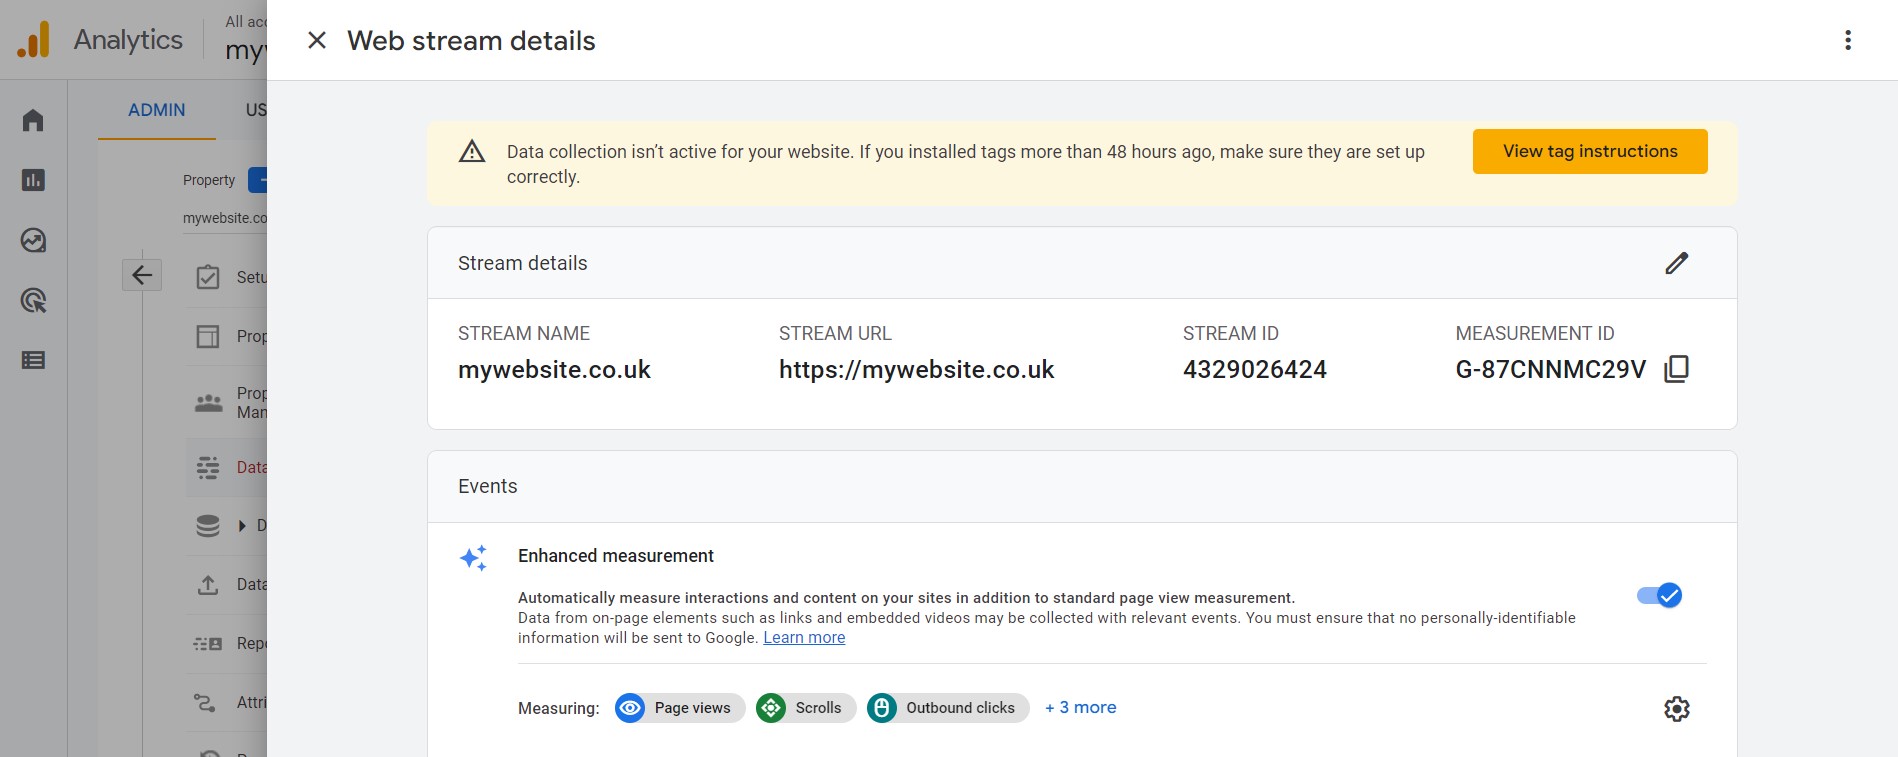
Scroll down the page and click the Configure tag settings option.

On the next page click the Show all link on the right side of the page to display the full list of settings.
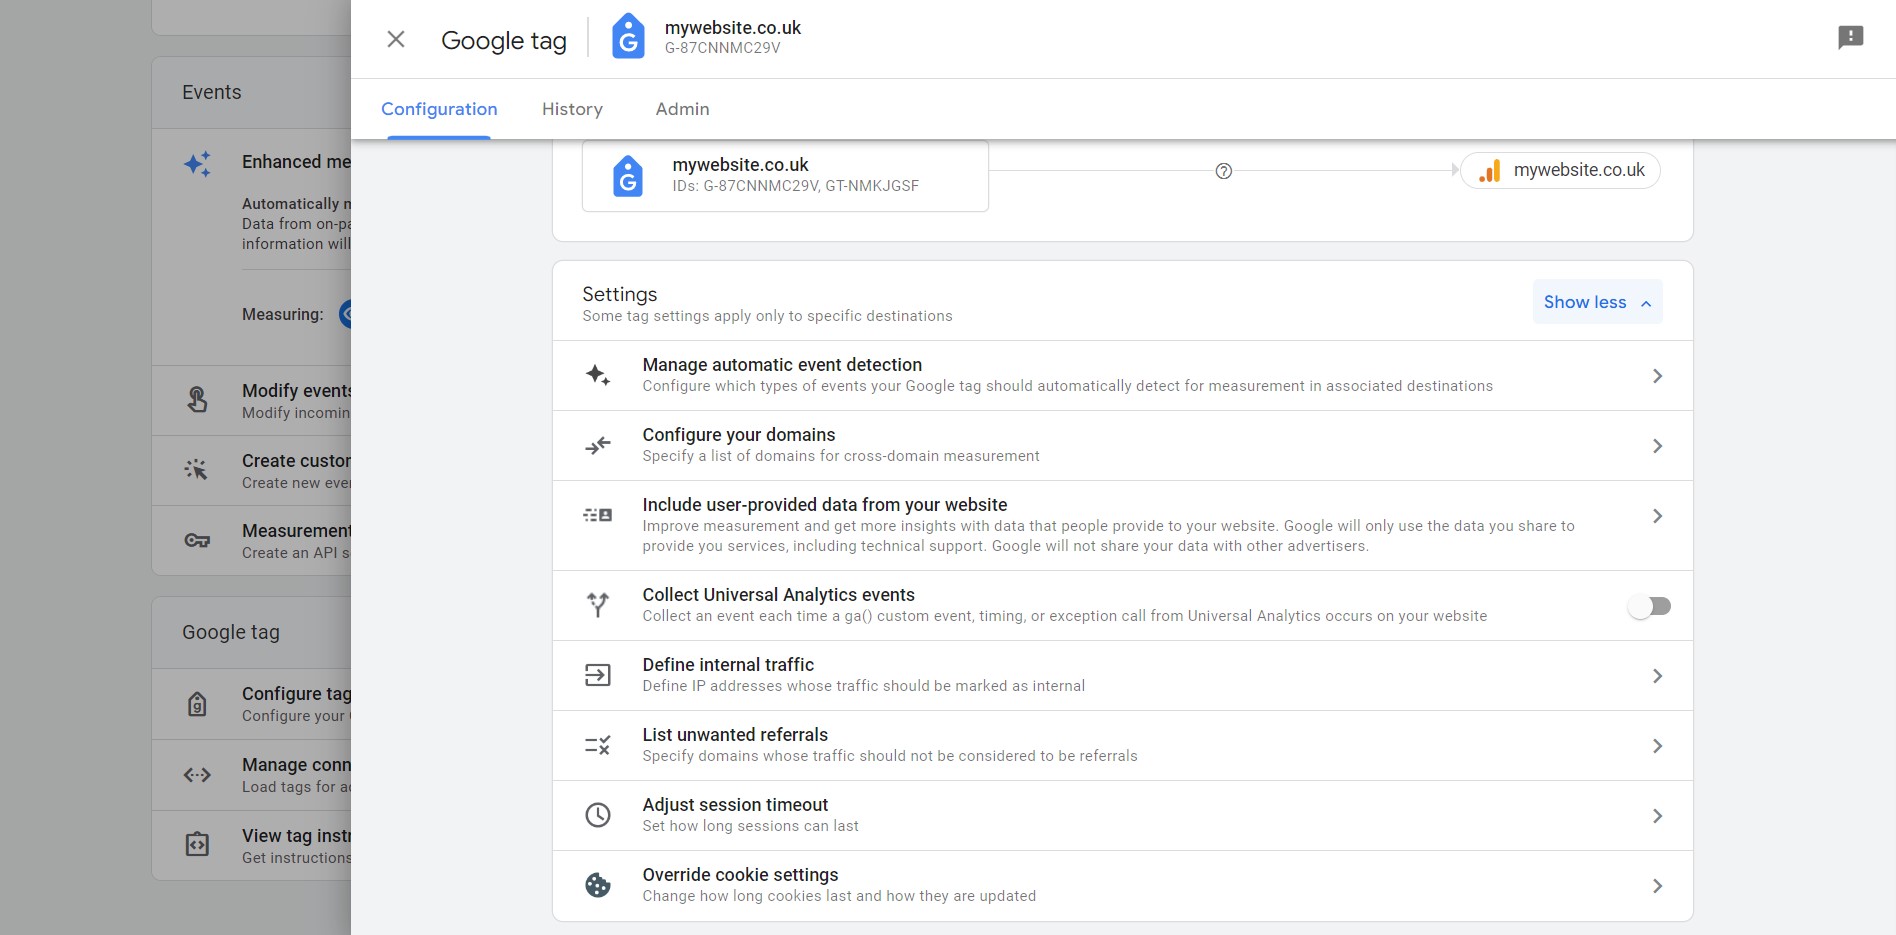
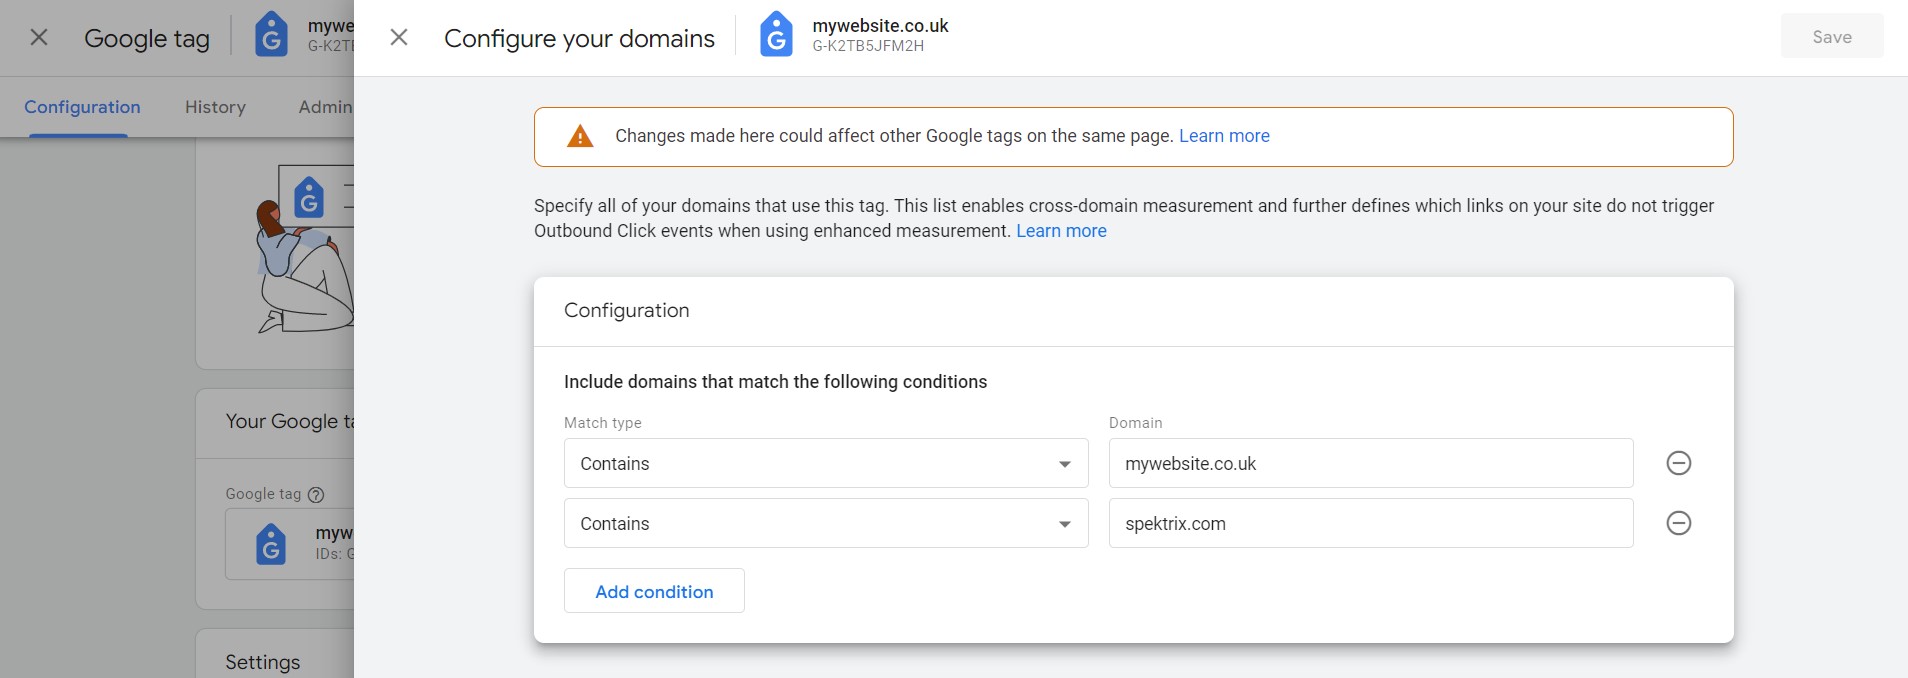
First, we need to Configure your domains. Choose this option from the list, click Add condition and enter your website address (without the https:// and www.) into the Domain field and press Save. Click Add condition again and add spektrix.com into the second Domain field and press save.
Secondly, we need to List unwanted referrals. Choose this option from the list, click Add condition and enter your website address (without the https:// and www.) into the Domain field. Click Add condition again and add spektrix.com into the second Domain field and press save.
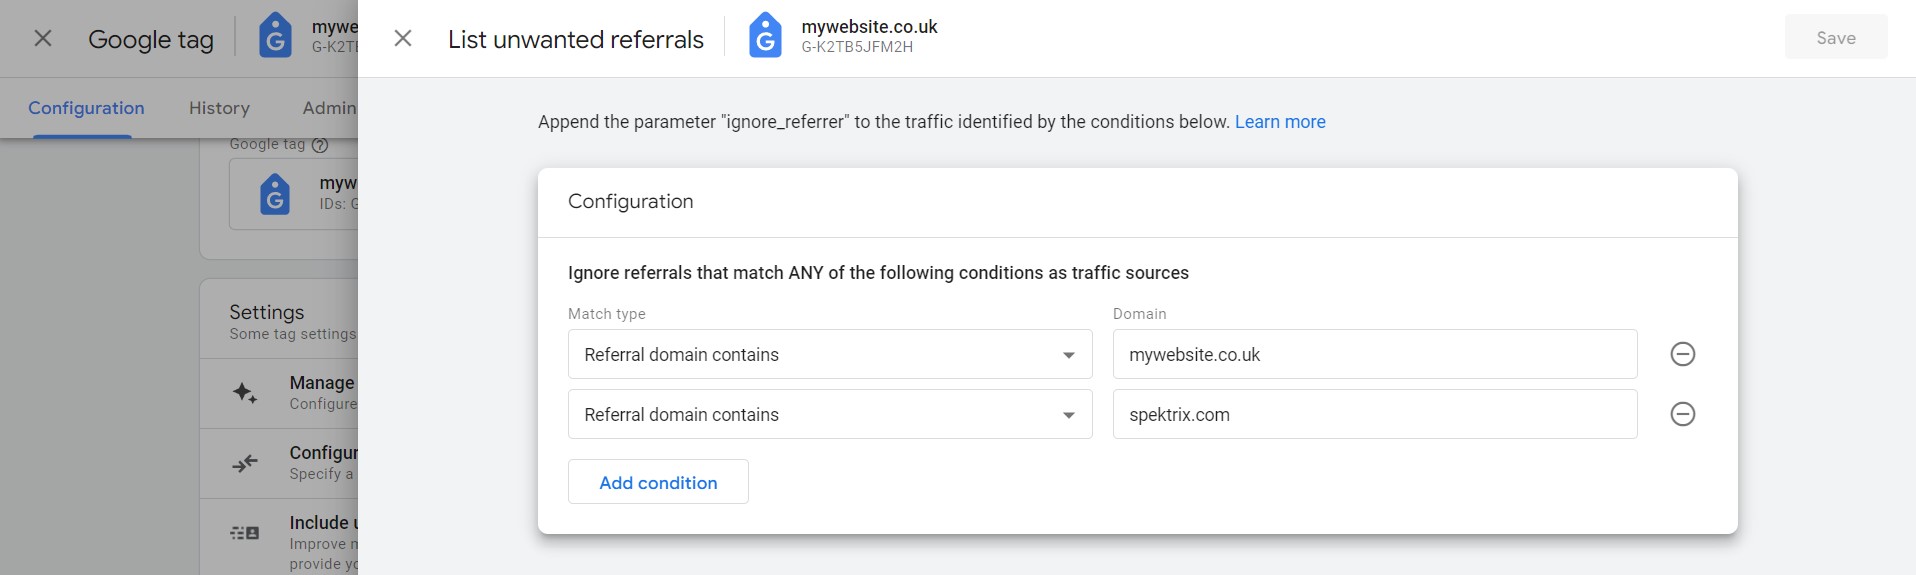
These two settings allow GA4 to understand which links to classify as Enhanced Measurement Outbound clicks and exclude unwanted referrals appearing in reports from the ticketing system and payment gateway.
You may wish to add further domains to these lists depending on your set up. For example, you may use a virtual waiting room such as Queue-it.
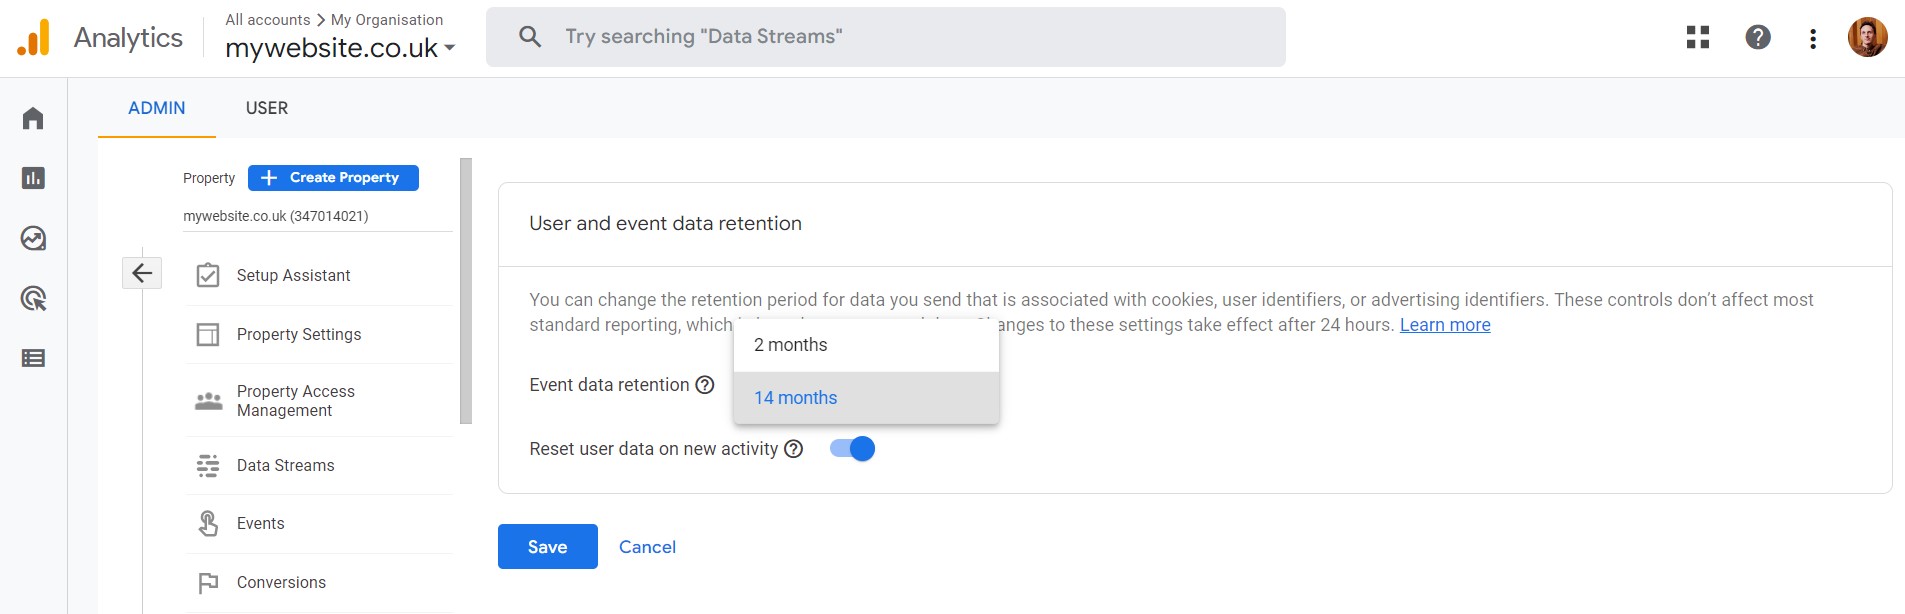
Data retention
Finally, you can set how long data is retained about users. The default is two months, which can be extended to 14 months if required (recommended). Although the data is anonymous, you may need to update your privacy policy on how long you are retaining this type of data about your users.
That is the basic set up of Google Analytics 4 complete, ready for Spektrix data. There are further configuration options for the rest of your website and user actions you may wish to track. They are outside the scope of this article, so speak to the Digital Culture Network or an integration partner to find out more.
Setting up Google Tag Manager
With your Google Analytics 4 account set up and ready to receive data, we need to configure Google Tag Manager to pass the right data across from Spektrix.
Tag Manager is a free tool that acts as a container for any additional code you want to place on your website. In this case, we are using it to pass interactions with Spektrix web pages and the eCommerce data on the confirmation page to GA4.
We are following the steps outlined in the Spektrix integration documentation.
How to check if you already have Tag Manager installed
First, we need to check if you already have Google Tag Manager installed on your Spektrix website (most do).
Amend the following URL with your Spektrix client name (you can find this in the URL of your normal system login) and log in to the website admin interface.
https://system.spektrix.com/CLIENTNAME/client/websiteadmin/websiteadmininterfacepage.aspx
Note: To access this area of the system, your Spektrix user account needs to be assigned Web Integration Administrator permission.
Click the Domain Specific Config tab.
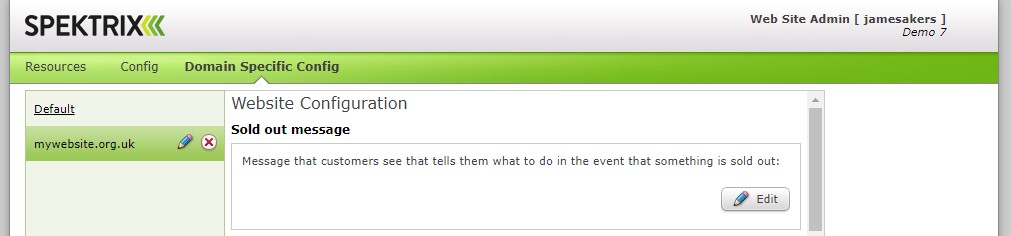
On the left column, there may be two options. One Default and one with your website address. Click your website address if it is there, if not continue with the Default option.
Scroll down the page to the option Specify HTML Headers.
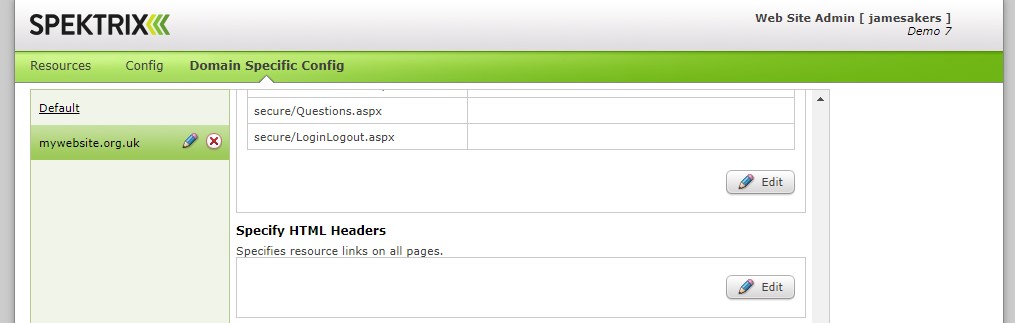
If empty, jump to Setting up a new Google Tag Manager Account.
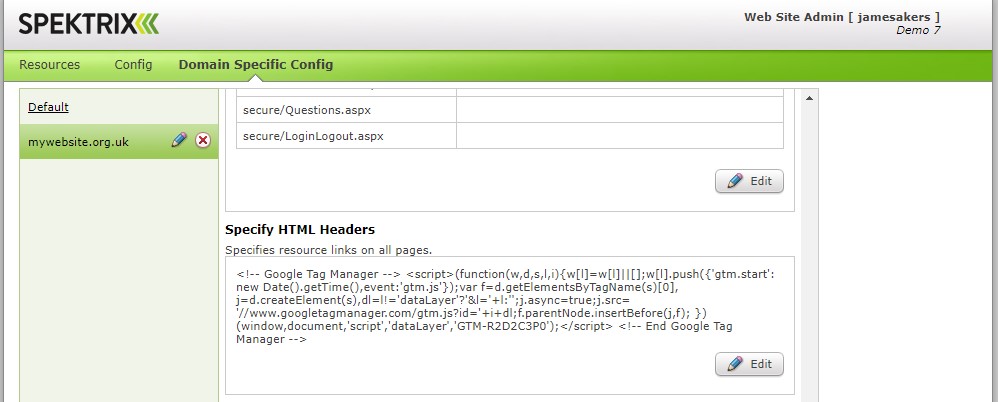
If it has code inside looking like this, you already have a Google Tag Manager account, hurrah!
You should have access to the Tag Manager account with your existing Google Account details. Try logging in to Tag Manager and if there are no accounts listed, try logging in with other Google Accounts in your organisation or ask any 3rd party agencies you may have worked with to add your account. Once you have access, jump to Importing the Spektrix GA4 recipe.
Setting up a new Google Tag Manager Account
If there is no existing account, you can create a new one. Go to the Google Tag Manager website, log in with your Google Account login details and click Create Account.
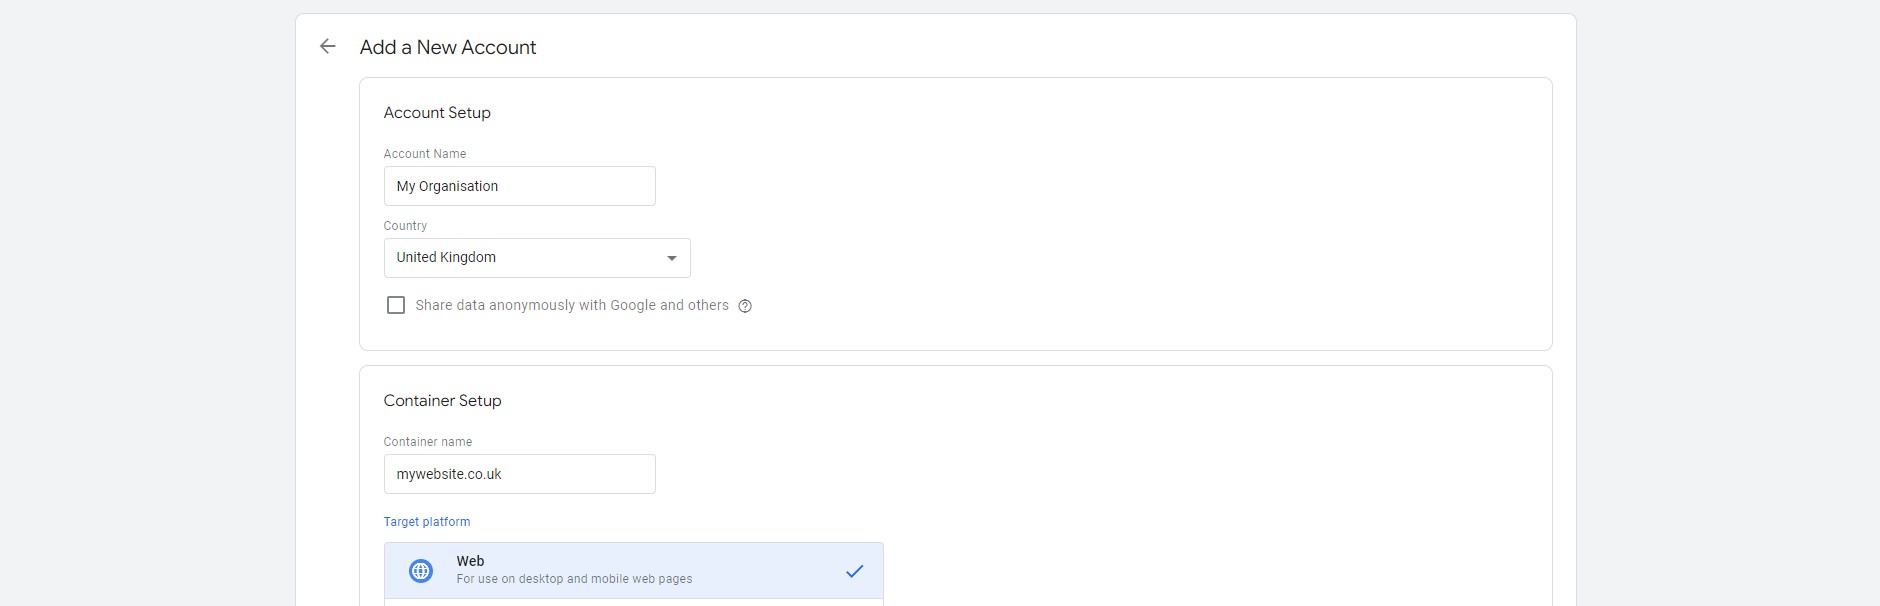
Add your organisation name as the Account Name, your web address to the Container name field, and select Web as the Target platform. Click Create to move to the next step and accept Google’s Terms and Conditions (after reading them in detail).
A popup will display the Tag Manager code for your website, copy the first block of code.
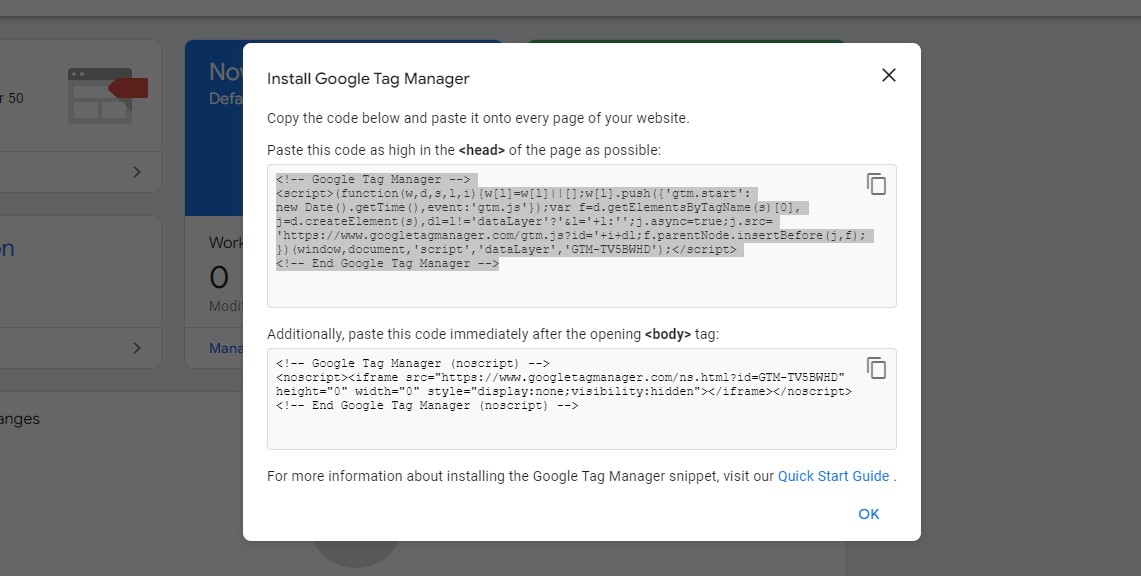
Back to the Spektrix Domain Specific Config page, click edit on the Specify HTML Headers field and paste the Tag Manager code in.
Note: Before pressing save, you need to delete https: from the text, otherwise, you will get an error message.

Press Save once you have edited the code. Google Tag Manager will now load on all Spektrix pages.
Importing the Spektrix GA4 recipe
The last step is to set up Tag Manager to pass the Spektrix eCommerce data to Google Analytics 4. We have created a template ready to import into your account, you just need the Measurement ID you saved earlier when creating your GA4 account.
Download the Spektrix GA4 recipe (Open the SharePoint link and click the download icon in the top left).
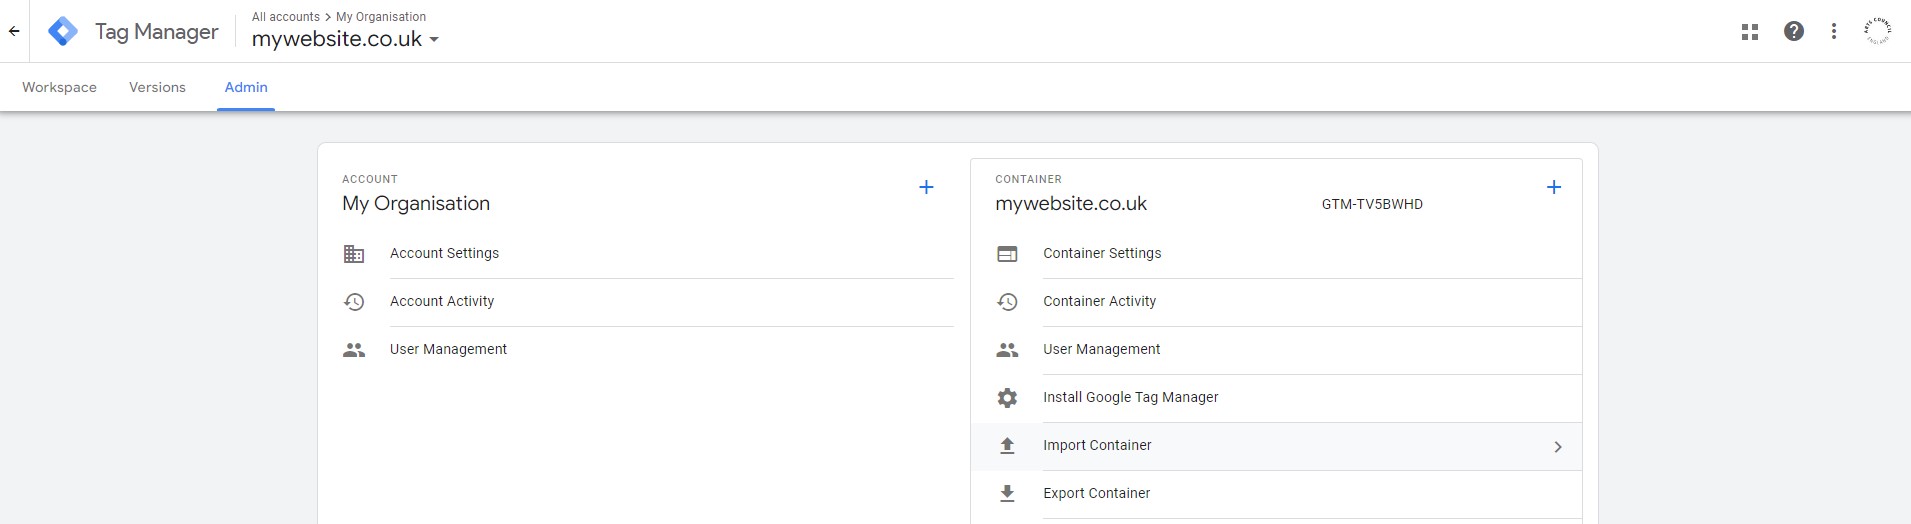
Login to Tag Manager, click the Admin tab and select the Import Container option.
Select the recipe file to upload and choose the Default Workspace. As we do not want to overwrite any existing tags you may have, choose Merge and Rename conflicting tags, triggers, and variables.
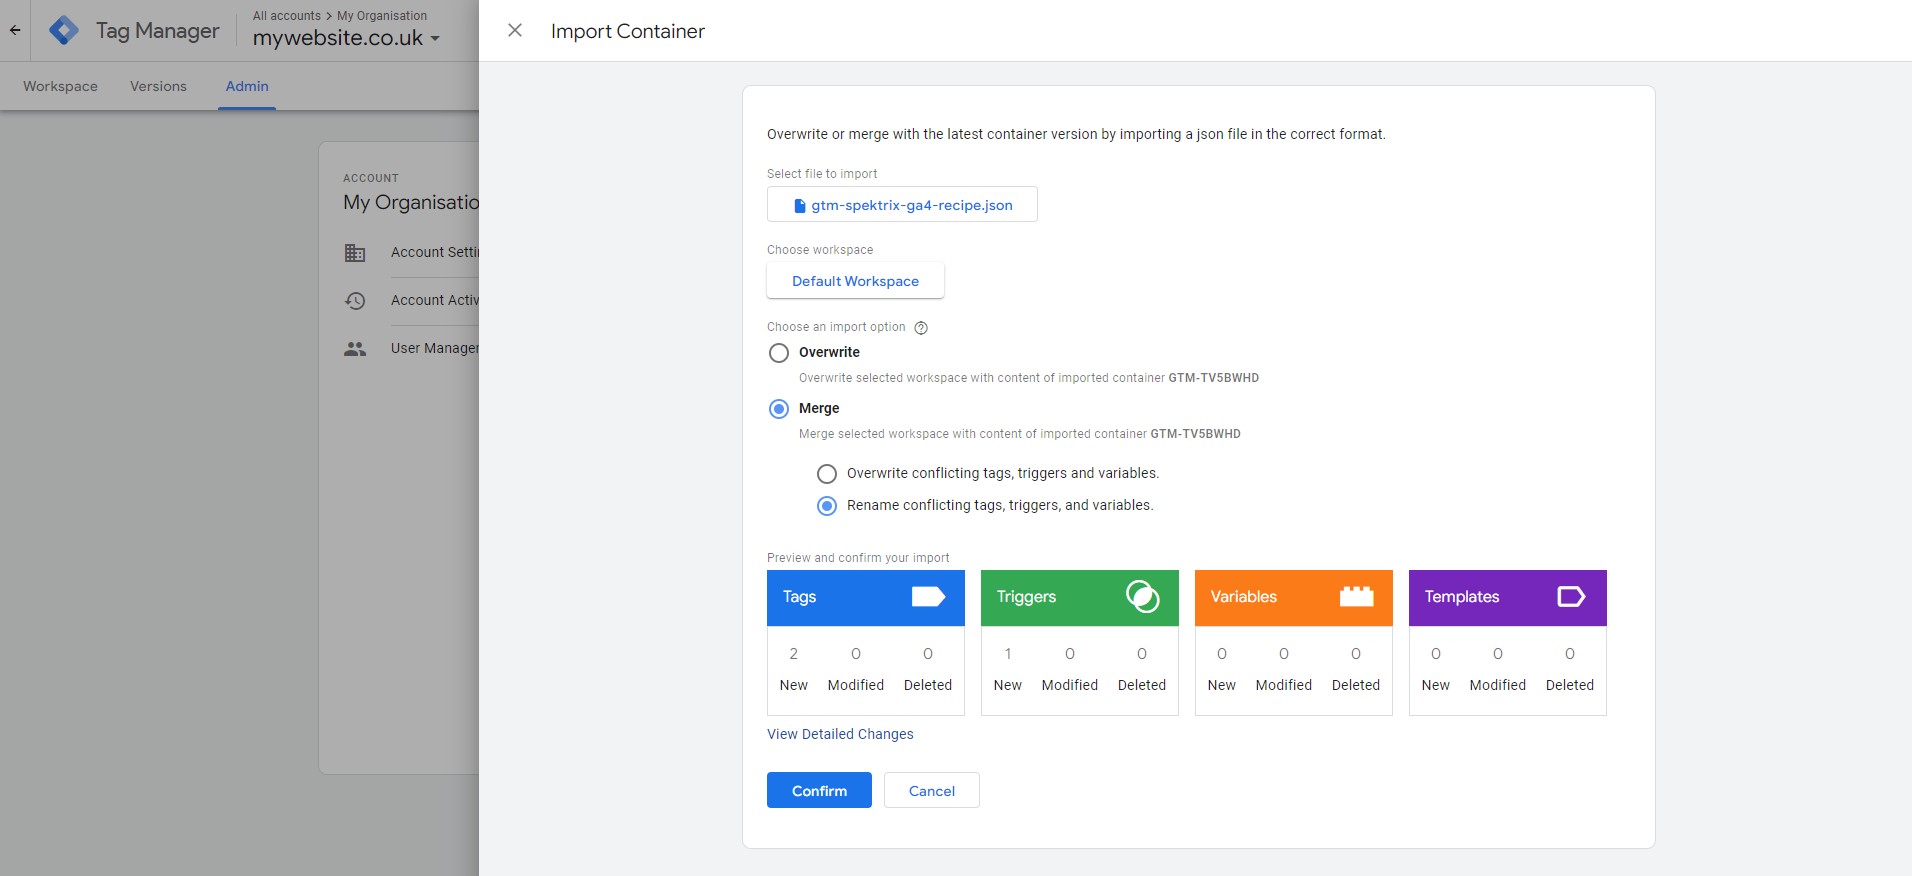
Press Confirm to import the template.
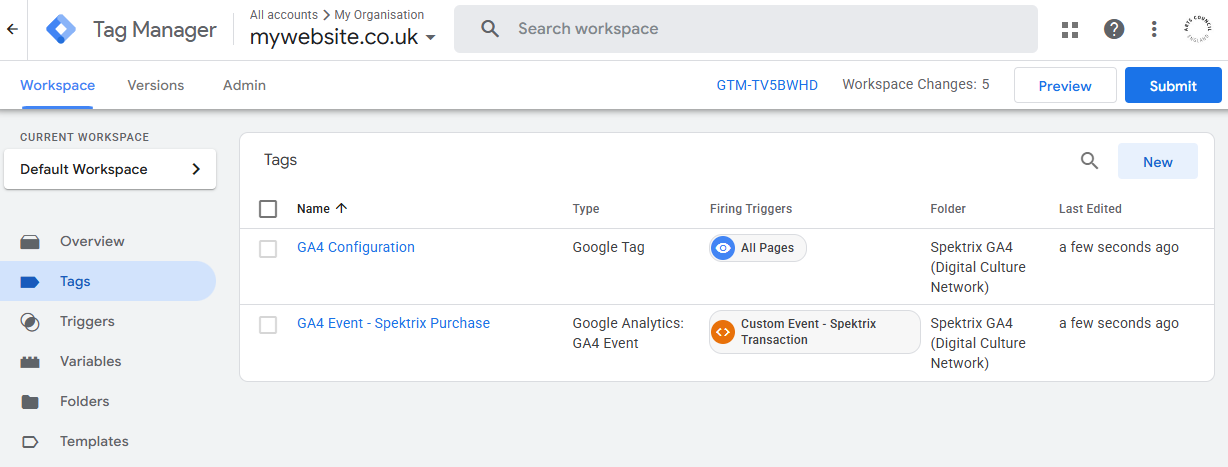
Click Tags on the left menu, you will see two new tags: GA4 Configuration and GA4 Event – Spektrix Purchase.
Click the Variables menu item on the left.
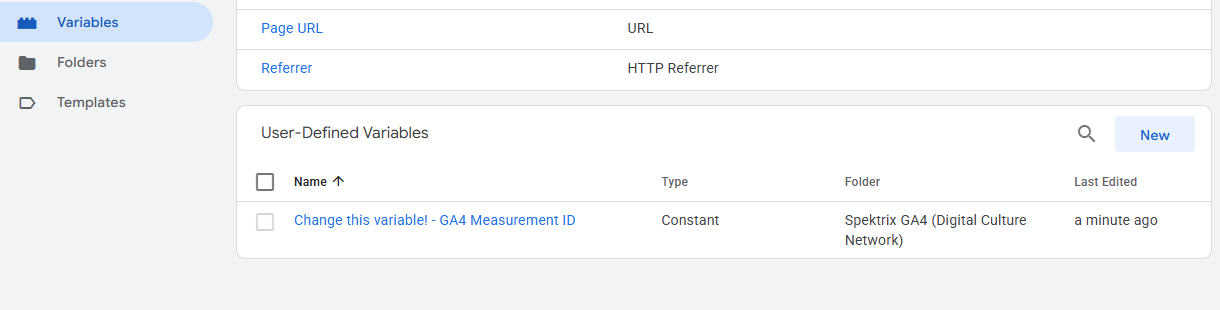
Click the Change this variable! – GA4 Measurement ID variable
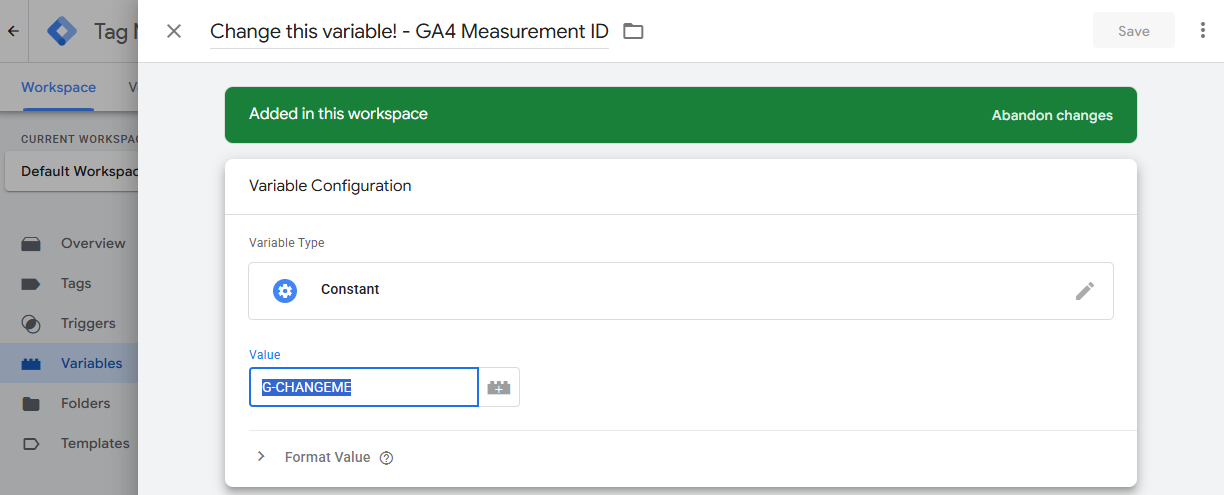
In the Value field, update this with the Measurement ID from your Google Analytics 4 account. You can find this under Admin > Data Streams > (Stream name).
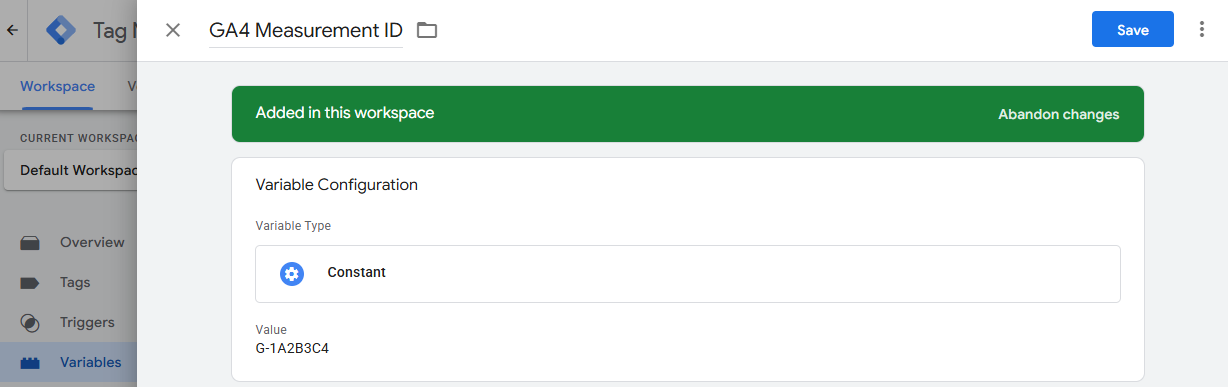
Once you have updated the field, remove Change this variable! – from the variable name and press Save to go back to the Variables page.
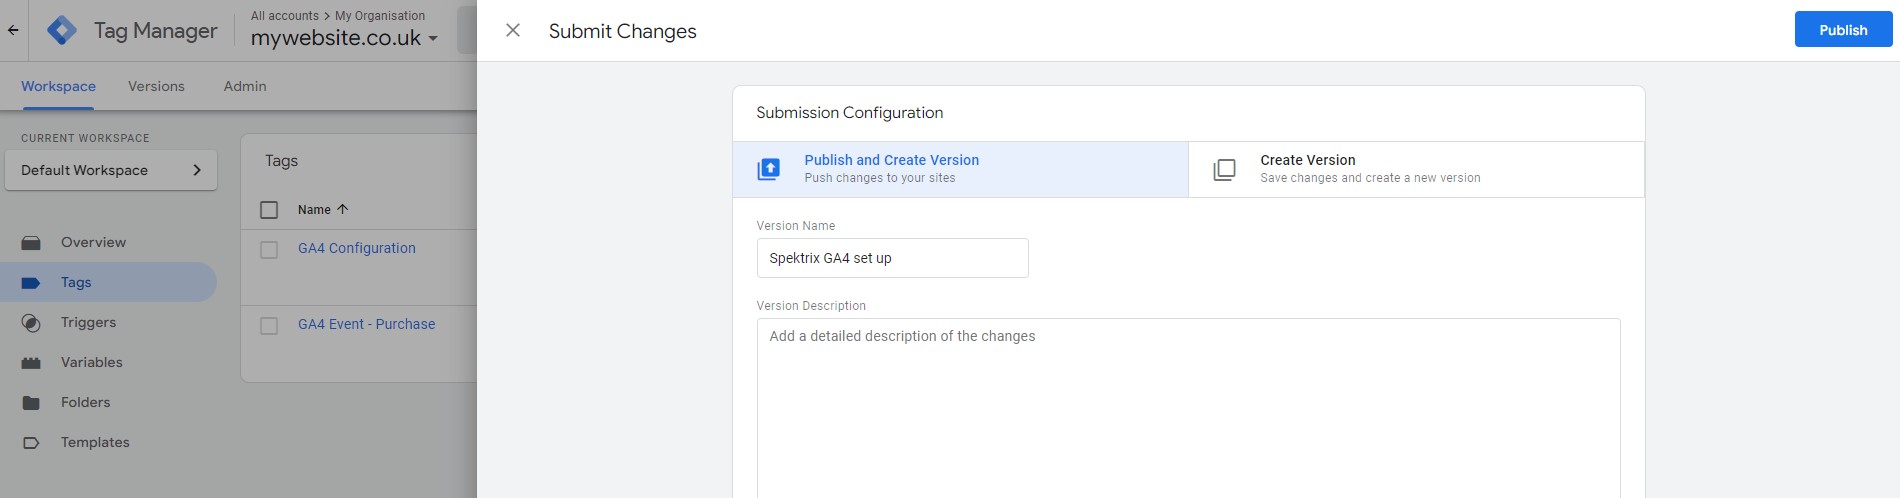
From here, press the Submit button in the top right corner. In the pop up, enter Spektrix GA4 set up into the Version Name field and press Publish.
That is it! You have successfully created a Google Analytics 4 account, configured Tag Manager, and published it live on your Spektrix web pages.
From this point onwards it will collect eCommerce data and user actions on the event and checkout pages. You will begin to see data appear in GA4 under Reports > Realtime.
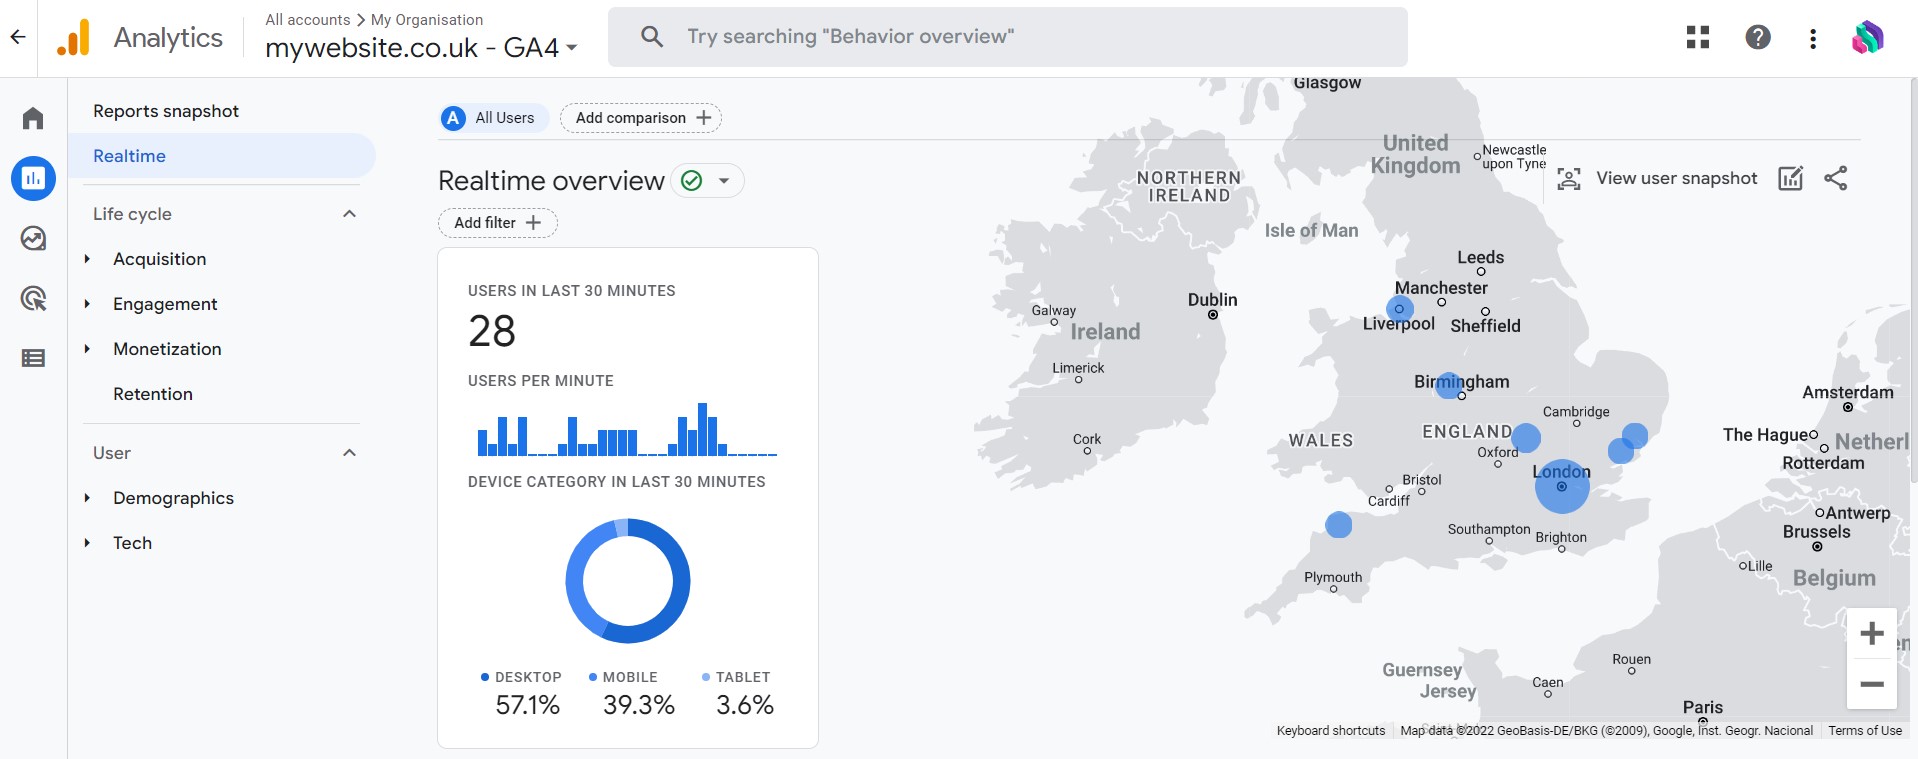
Note: For brand new accounts it can take some time for Google Analytics 4 to start showing real-time data about your website visitors. For other reports, there is a 24-hour delay to any data appearing.
Next steps with Google Analytics 4
In this article, we have installed a basic integration between Google Analytics 4 and Spektrix using Google Tag Manager. The same Tag Manager account can be used for the rest of your website and configured to track important user actions for your organisation. There are different ways to do this depending on what technology your website uses, so slightly too complex for this article.
If you need help with getting the most out of Google Analytics 4 and configuring it for your organisation, please get in touch with the Digital Culture Network or explore the Spektrix Partner Directory.
Further support
The Digital Culture Network is here to support you and your organisation. Our Tech Champions can provide free one-to-one support to all arts and cultural organisations who are in receipt of, or eligible for, Arts Council England funding.
Need help or would like to chat with us about any of the advice we have covered above?
Request a free one-to-one
To be the first to hear when new events are available and get the latest news from the Digital Culture Network, sign up for our newsletter below and follow us on Twitter @ace_dcn and LinkedIn for the latest updates.