Webinar recording – Getting started with Google Analytics 4
About the Webinar
In this webinar, presented by James Akers, Tech Champion for Data Analytics and Insight, you will learn how to get started with Google Analytics 4. We will explore each step from creating an account, through to navigating the interface and recommended settings.
You will learn:
- How to create an account and install Google Analytics 4 (GA4) on your website
- Which recommended settings and configuration options should be used
- What are the common questions new GA4 users ask
- Next steps for advanced configuration and integration with other systems
This is the first in a series of webinars and resources on GA4 from the Digital Culture Network, sign up to our newsletter to be the first to hear about new events and guides.
Approaching GA4 for the first time can be daunting, please remember you are not alone and we are here to help.
Resources, links and further information
Download the webinar presentation as a PDF here >
The following resources are all related to Google Analytics 4 and we have included a written step-by-step guide to create a new Google Analytics 4 account and install it on your website.
External GA4 training
The following websites contain many great resources on GA4:
If you are interested in training specific to the cultural sector, the AMA are running a Google Analytics 4 – Essentials course beginning in April 2023.
Creating and configuring a Google Analytics 4 account
You may already have an existing Google Analytics account, if it is older than 12 months it is most likely Universal Analytics, which will stop working later this year. You can use the same login to create a new Google Analytics 4 (GA4) property. Google is promoting users to “migrate” Universal Analytics to GA4 using it’s automated process, we recommend following the steps below to do it manually to prevent any misconfiguration.
Make a Google Account (if you don’t have one)
When creating a new Google Account, there is an option to Use my current email address instead. We suggest you create a Google Account using a shared inbox organisational email address (for example: [email protected]) and set this as the administrator of your different Google platforms. You can then add additional users at different permission levels (and remove them if they should ever leave). To save yourself from future heartache, do not use a shared Gmail account.
What type of Google Analytics account do I have?
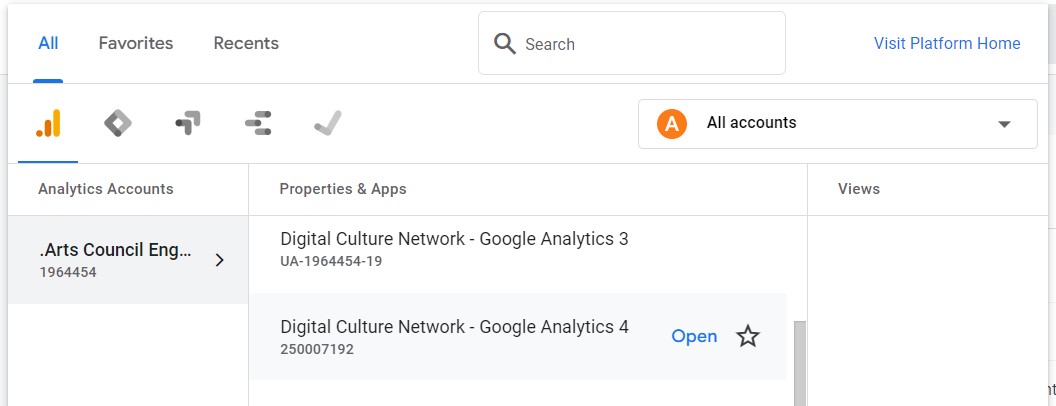
When you log in to Google Analytics you will either be prompted to create a new account, or it will load the analytics homepage. If you see the home page you can click the dropdown next to the search bar to show more information about the account.

There is an identity number (ID) under the name in the Properties & Apps column. If yours begins with UA-XXXX-XX, it is a Google Universal Analytics account. If it is a number, it is a Google Analytics 4 account.
Creating a new Google Analytics 4 property
If there is no existing GA4 account, you can set up a new one by navigating to the Admin section using the cog icon at the bottom left of the screen.
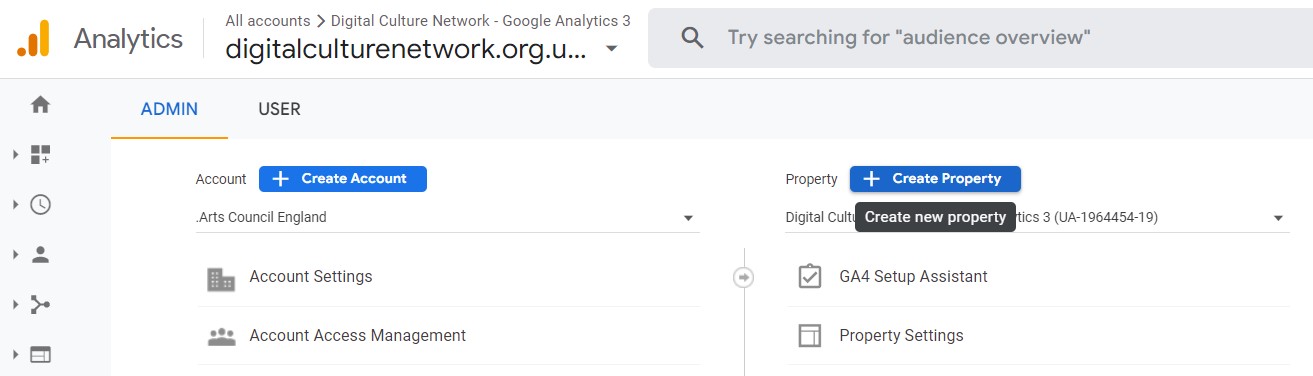
On the second column click the + Create Property button.
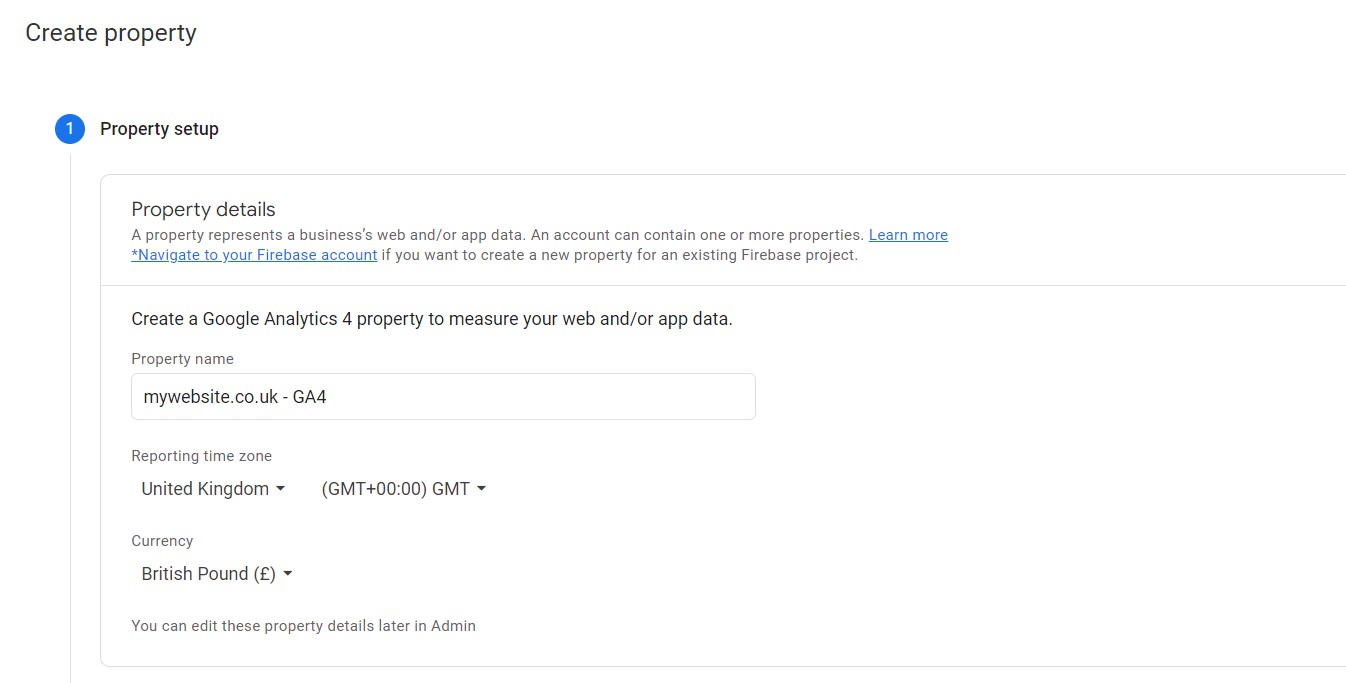
Here you can give your new property a name, we recommend your website address followed by – GA4. Set the time zone and currency to your locality and press ‘next’. The following page will ask optional questions about your industry category (most likely Arts & Entertainment), business size, and how you intend to use GA4. Click Create to move to the next step.
Create your Data Stream
Google Analytics 4 can collect data from multiple websites and apps. In this example we are setting up a data stream for a website, so select Web from the options.
Here you will need to enter the web address of your website and give it a name. We recommend the same for both.
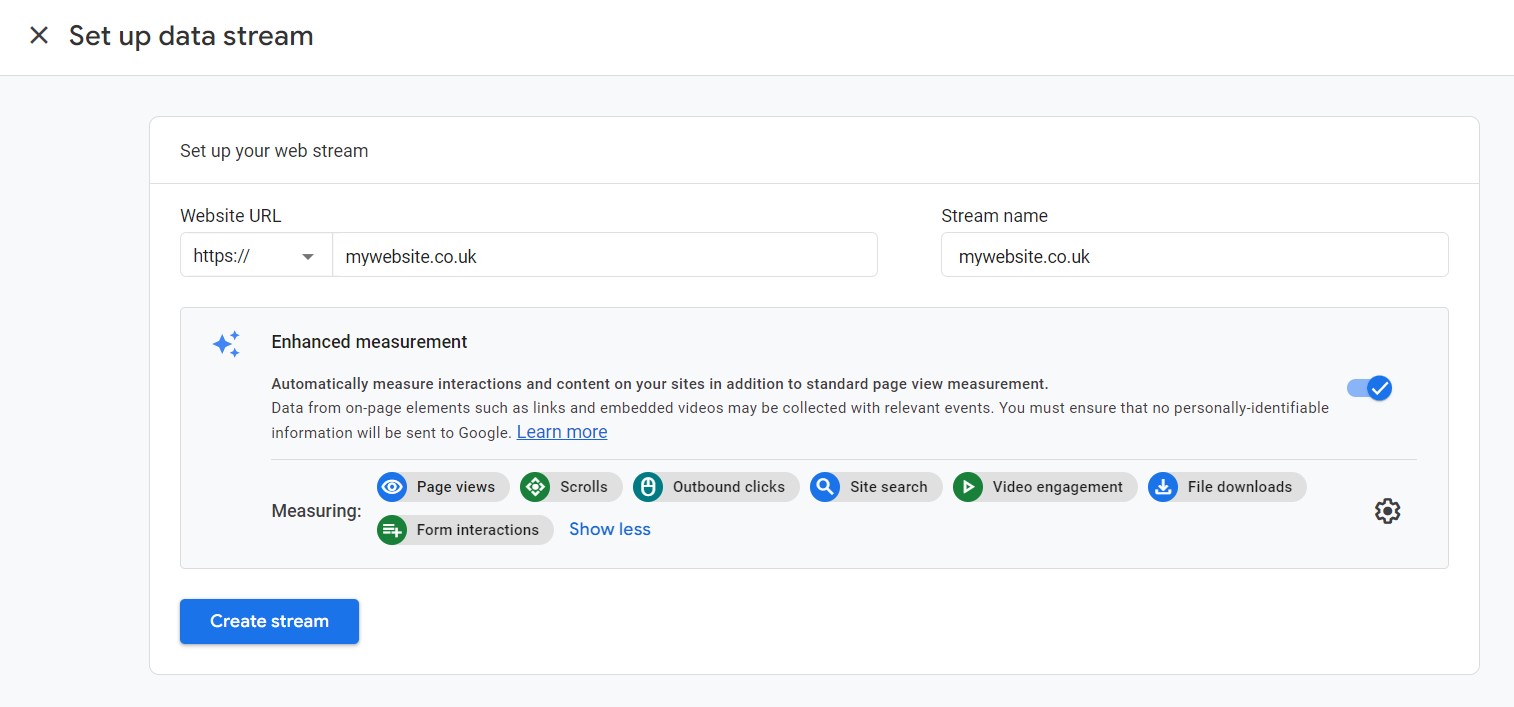
There are options for Enhanced Measurement, these are additional user actions which can be tracked on your website and explored in Google Analytics. Click the cog icon to toggle individual Enhanced Measurement settings on or off.
One of the Enhanced Measurement settings is Form interactions which is a new addition that we recommend turning off at this stage as it can add a lot of unnecessary data to your reports. You can turn it back on at any time through the Admin settings.

Note: If your website has YouTube videos that autoplay on your web pages, such as in the header, you may wish to turn off the Video engagement setting. This can also be done via the Enhanced Measurement settings. We have seen a few cases where this setting prevented the videos from playing. It may not be the case for your website, but something to check once you have set GA4 live on your site.
Once you are happy with your settings, click Create stream.
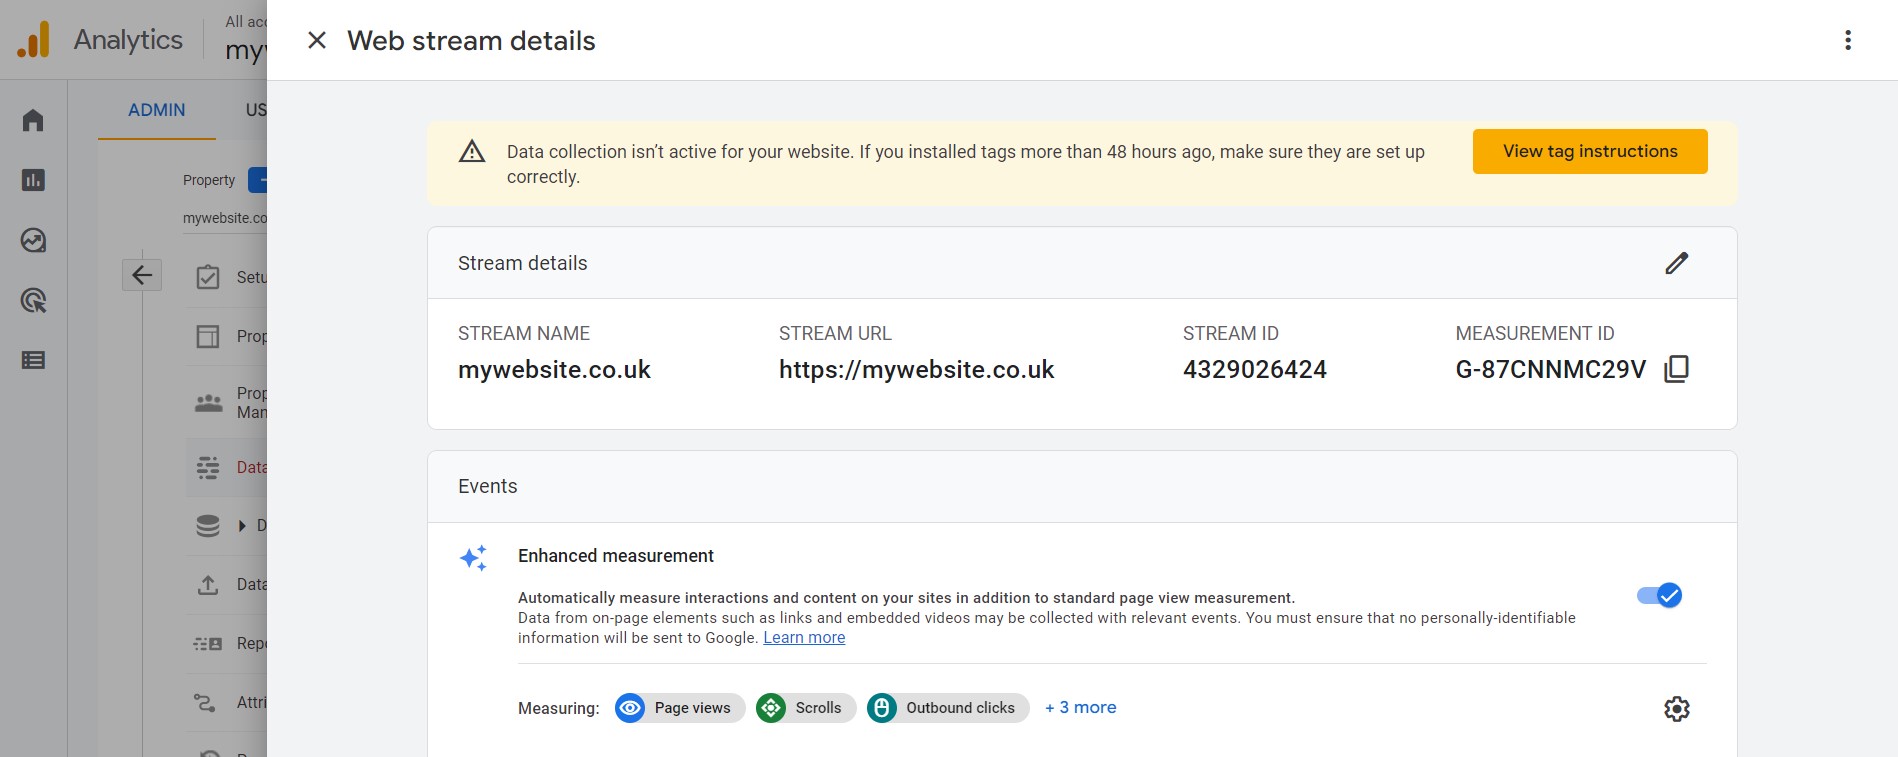
You will be presented with Installation instructions in a pop up. We will be installing GA4 manually, using Google Tag Manager, so can close this page using the X.
The Web stream details page will load with your Measurement ID and the configuration options you have just selected.
Installing GA4 on your website
At this point a new screen will pop up with options for installing GA4 on your website. If you know which platform your website is built on you can choose one of the options to see an installation guide. If you are unsure, you can click the Scan button and Google will try to automatically work out what platform is used and present you with the correct instructions. There are also options for installing the code manually if needed or your website is using Google Tag Manager to manage scripts.
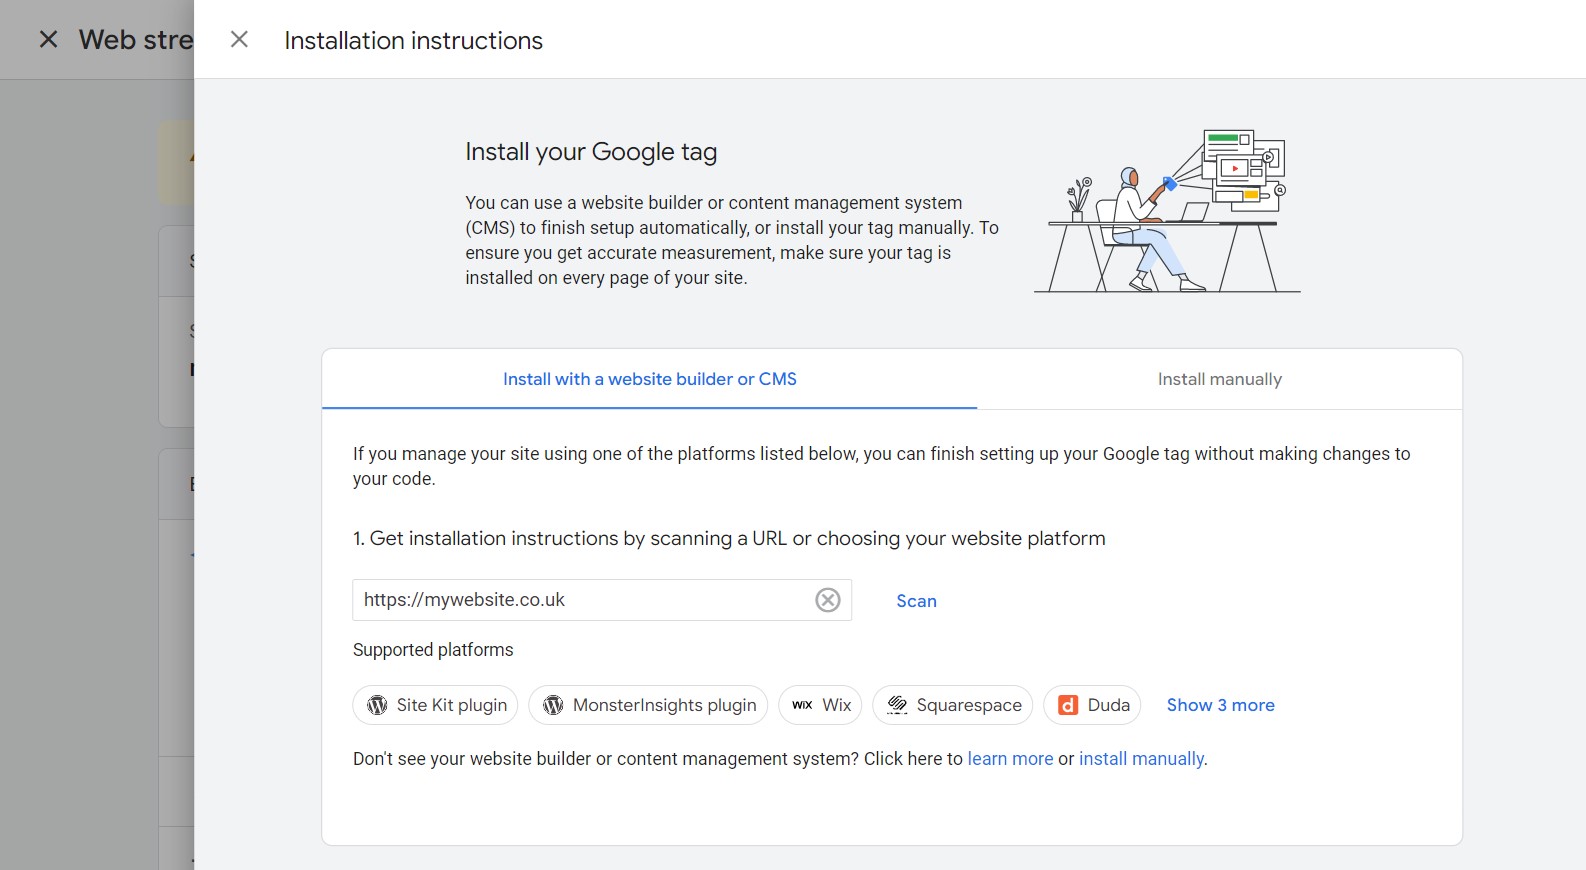
In the webinar we used Google’s Site Kit plugin to install Google Analytics 4 on a WordPress website.
Recommended configuration settings
We recommend the following settings for any new accounts. Navigate to the Admin section by clicking the cog in the bottom left corner. Click Data Streams from the list of options and click your website stream. This will load the Web stream details page.
Scroll down the page and click the Configure tag settings option.

On the next page click the Show all link on the right side of the page to display the full list of settings.
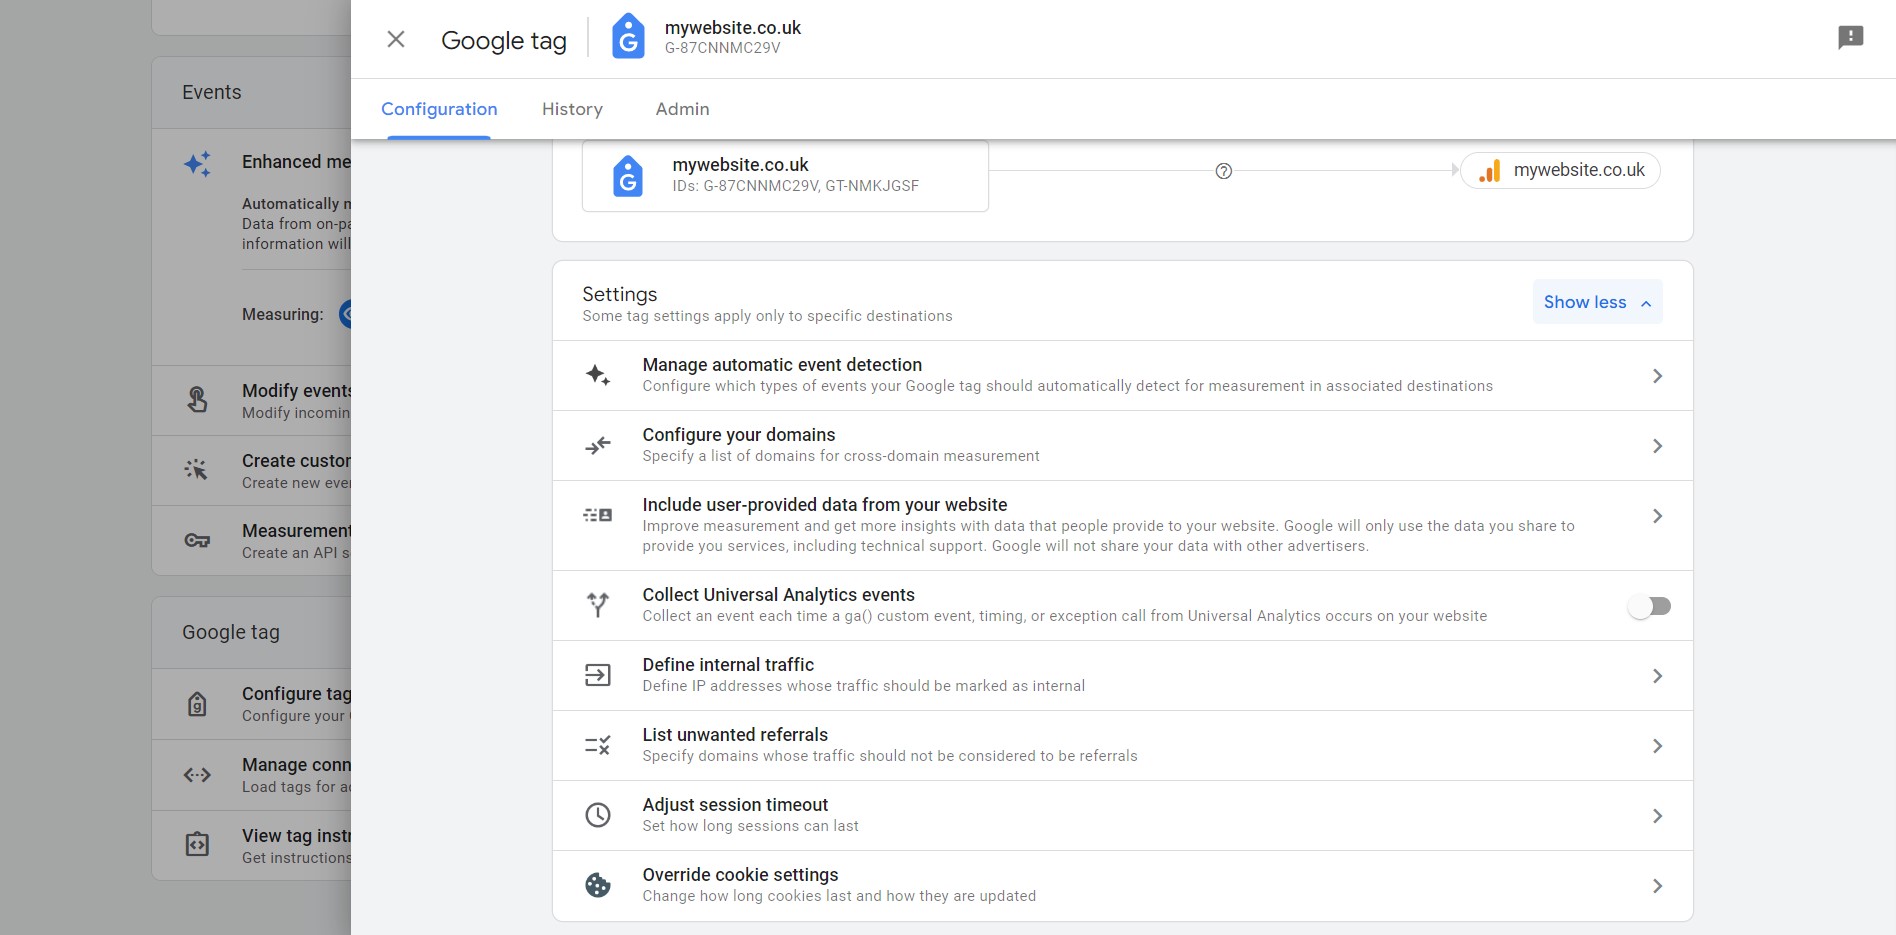
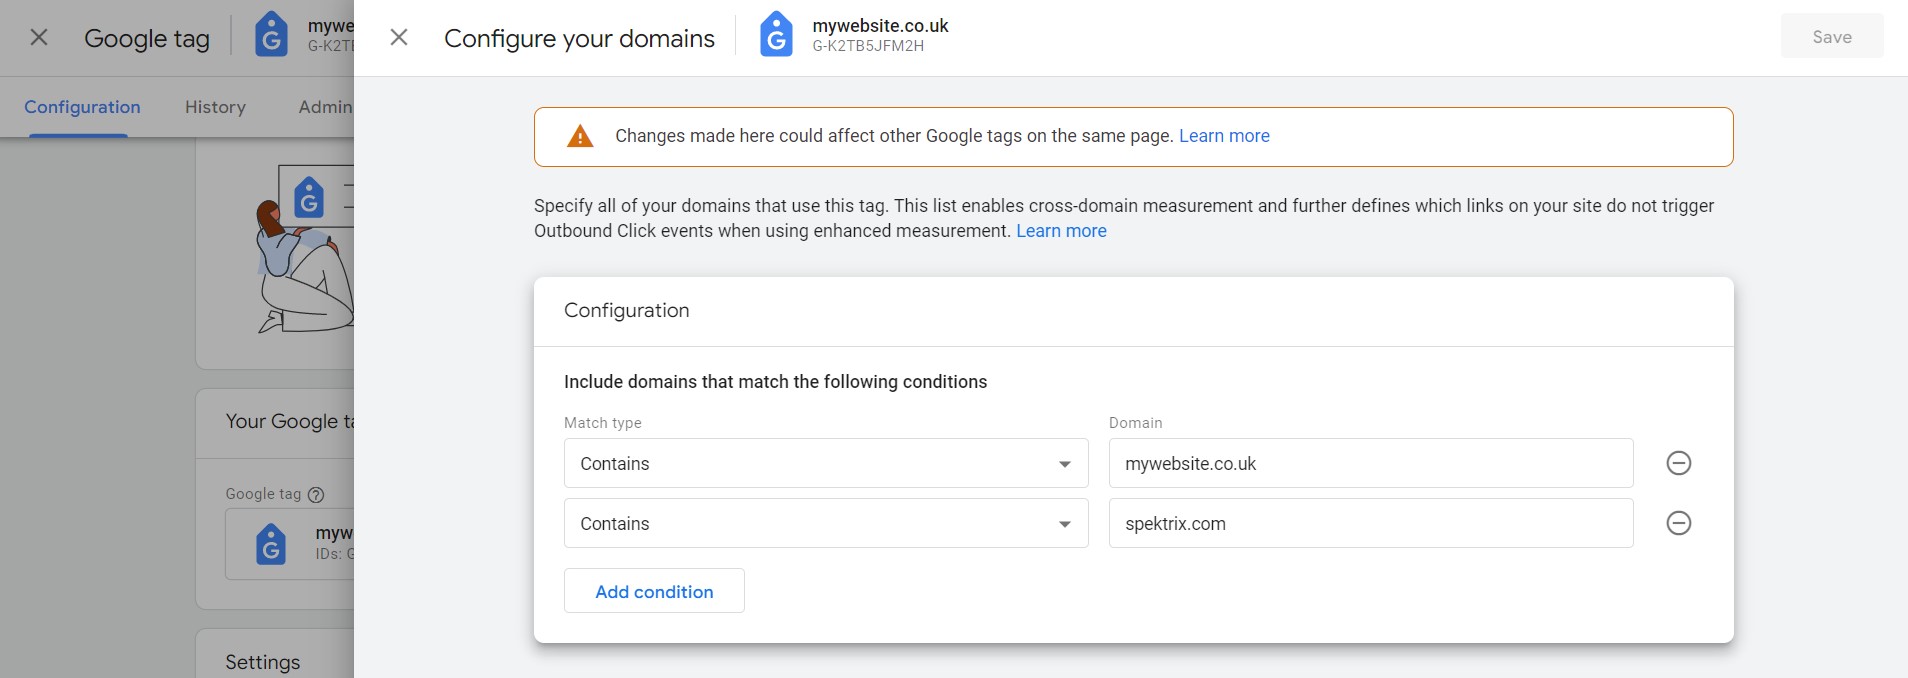
First, we need to Configure your domains. Choose this option from the list, click Add condition and enter your website address (without the https:// and www.) into the Domain field and press Save. If you use any ticketing systems or payment gateways, you may need to add them here too. Click Add condition again f you have any additional domains into the second Domain field and press save.
Secondly, we need to List unwanted referrals. Choose this option from the list, click Add condition and enter your website address (without the https:// and www.) into the Domain field. Click Add condition again if you have any additional domains to add into the second Domain field and press save.
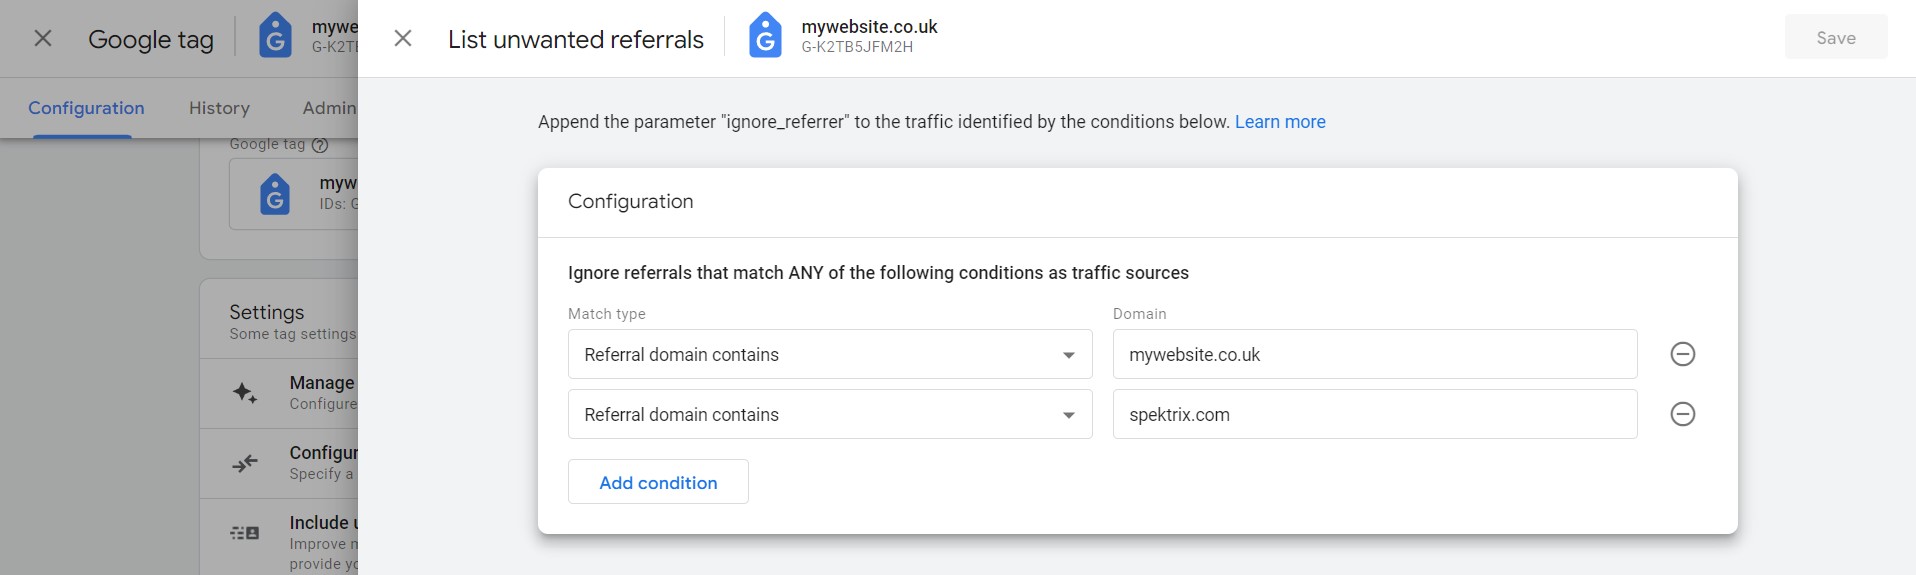
These two settings allow GA4 to understand which links to classify as Enhanced Measurement Outbound clicks and exclude unwanted referrals appearing in reports from any ticketing systems and payment gateways.
You may wish to add further domains to these lists depending on your set up. For example, you may use a virtual waiting room such as Queue-it.
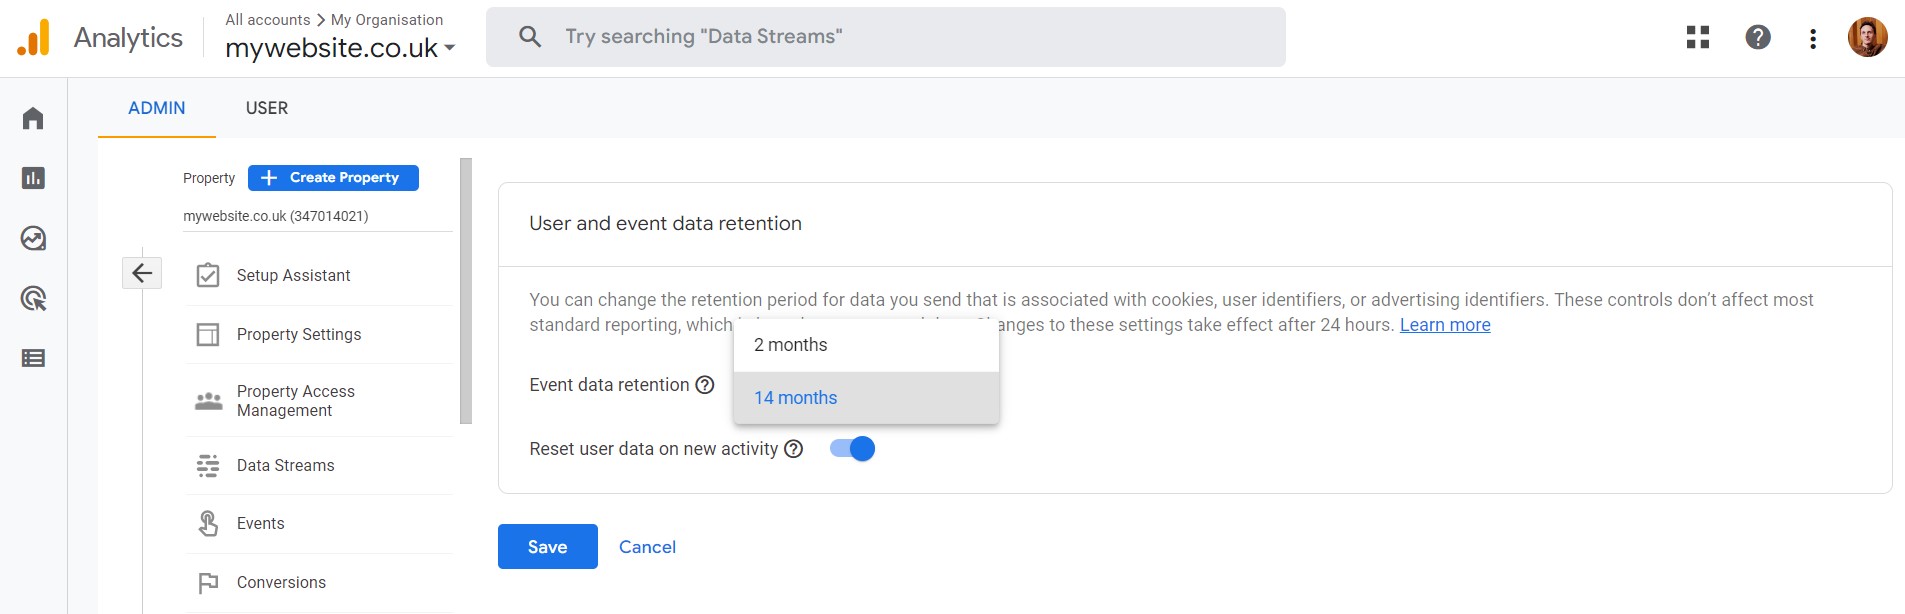
Data retention
Finally, you can set how long data is retained about users. The default is two months, which can be extended to 14 months if required (recommended). Although the data is anonymous, you may need to update your privacy policy on how long you are retaining this type of data about your users.
That is the basic set up of Google Analytics 4 complete, ready to begin collecting data. There are further configuration options for the rest of your website and user actions you may wish to track. They are outside the scope of this article, so speak to the Digital Culture Network or attend our future webinars find out more.
From this point onwards it will collect website user activity. You will begin to see data appear in GA4 under Reports > Realtime.
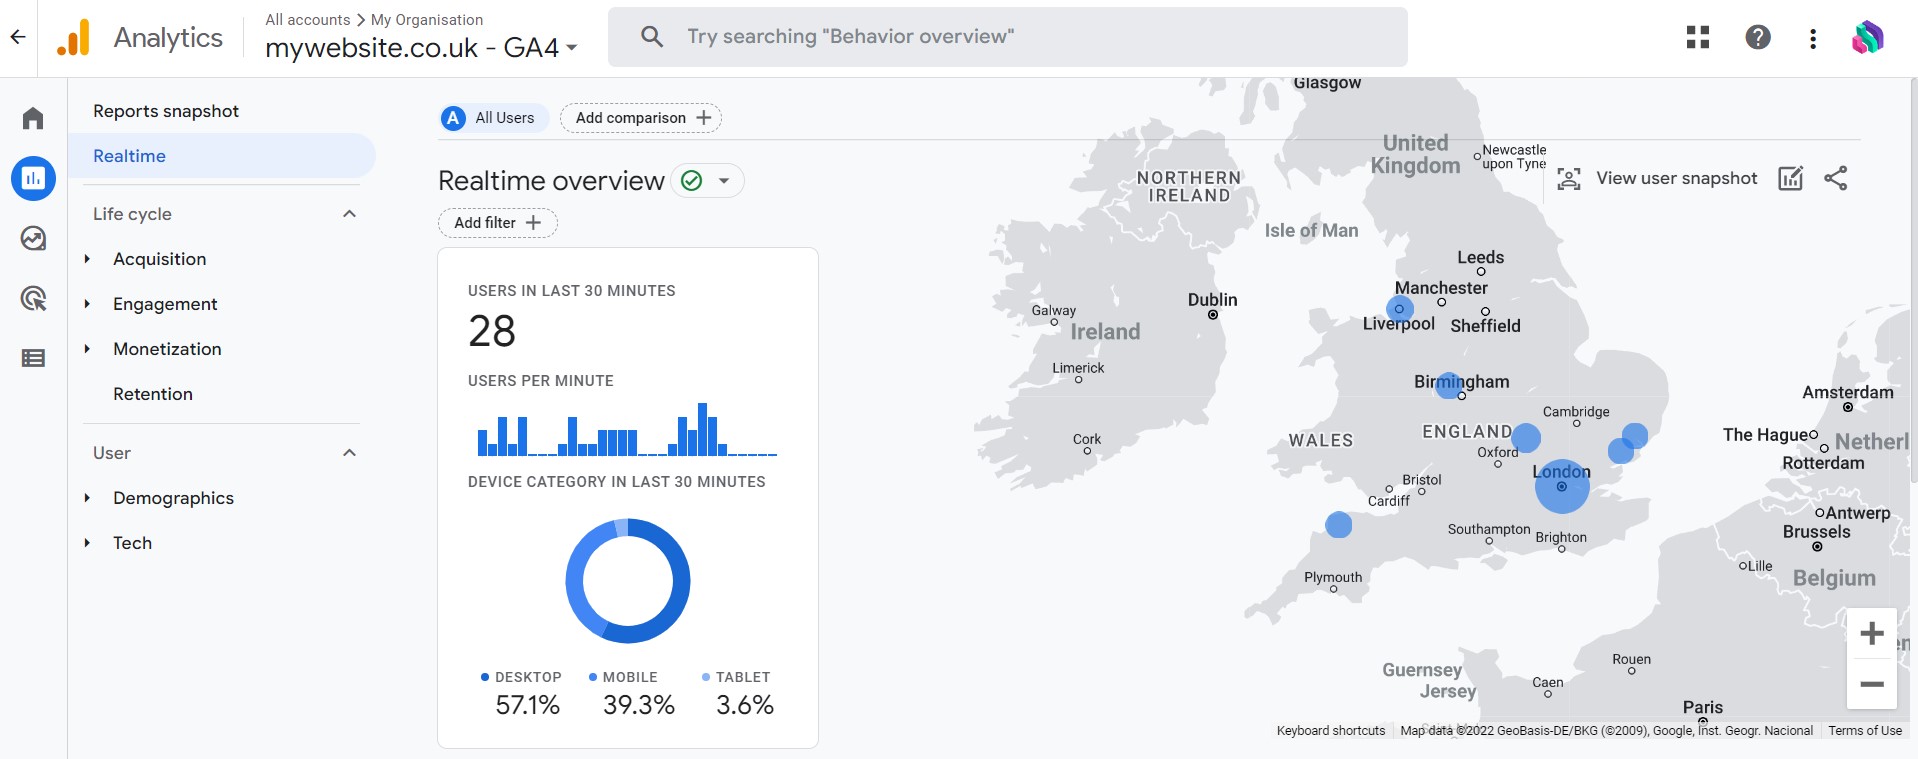
Note: For brand new accounts it can take some time for Google Analytics 4 to start showing real-time data about your website visitors. For other reports, there is a 24-hour delay to any data appearing.
Next steps with Google Analytics 4
In this article, we have created a brand new Google Analytics 4 and installed it on your website. If you need help with getting the most out of Google Analytics 4 and configuring it for your organisation, please get in touch with the Digital Culture Network.
Further resources:
Further support
The Digital Culture Network is here to support you and your organisation. Our Tech Champions can provide free 1-2-1 support to all arts and cultural organisations who are in receipt of, or eligible for, Arts Council England funding.
Need help or would like to chat with us about any of the advice we have covered above?
Request a free 1-2-1
To be the first to hear when new events are available and get the latest news from the Digital Culture Network, sign up for our newsletter below and follow us on Twitter @ace_dcn and LinkedIn for the latest updates.